Introduction
This is the documentation for midnight-extractor,
a tool that extracts selected Halo2 circuits from Midnight’s codebase into PCL,
the language used by Picus for analyzing ZK circuits.
The documentation is divided in two parts, the User manual and the Developer manual.
The User manual contains the instructions for building and using the tool, and a tutorial on how to use AuditHub for uploading extracted circuits and verifying them with Picus.
The Developer manual describes how to write new harnesses and how to add support for new chips and types.
Click on the right arrow to continue through the User manual or you can jump directly to the Developer manual.
Installation
The extraction tool needs to build from source because the harness definitions depend on
the circuits crate in midnight-zk. At
the time of writing the tool actually depends on the forked version of the crate.
After cloning the repository,
verify that the version of midnight-circuits that the tool is linked against
is the version you are interesting in extracting from.
Check that the dependency is pointing to the right repository and the right revision.
Also make sure that it has the extraction feature enabled. Without this feature the
circuits will not include the necessary integrations.
For example:
$ cargo info midnight-circuits
midnight-circuits
version: 5.0.1 (from https://github.com/Veridise/midnight-zk#7042b270)
license: unknown
rust-version: unknown
features:
 +default              = []
  dev-curves           = [midnight-curves/dev-curves, midnight-proofs/dev-curves]
  extraction           = [extractor-support, testing, midnight-proofs/extraction, picus/extractor-derive]
  extractor-support    = [dep:extractor-support]
  heap_profiling       = []
  serde                = [dep:serde]
  serde_derive         = [dep:serde_derive]
  serde_json           = [dep:serde_json]
  testing              = [num-bigint/rand]
  truncated-challenges = [midnight-proofs/truncated-challenges]
After verifying everything looks good you can build the tool with the usual commands.
The tool can be found in target/release/midnight-extractor.
cargo build --release
target/release/midnight-extractor --help
Extraction
After building the tool you can use the midnight-extractor CLI to extract the circuits.
Quickstart
To extract all the circuits you can use the extract-all.sh script located in the scripts directory.
The Picus representation of the extracted circuits can be found in the picus_files directory.
CLI usage
The midnight-extractor CLI builds a list of circuits at runtime and extracts them into PCL.
The CLI has a series of flags and arguments that allows controlling the selection of circuits to extract. The CLI also has
flags for controlling the output produced by the tool.
Use the
--helpflag to see the full list of options.
Circuit selection
Each circuit has 4 properties for filtering and selection; instruction, chip, type, and name.
The instruction groups together circuits that are related and, in general, corresponds to an instruction-like trait
(i.e. arithmetic corresponds to ArithInstructions or ecc to EccInstructions). The instructions are selected as
positional arguments. Adding instructions to the CLI invocation creates a set of selected instructions. If no
instructions are passed to the CLI then all instructions are considered.
The chip declares what concrete implementation of the instruction is used by the circuit. Different chips
implement the same instruction traits and this parameter allows configuring what chip is going to be targeted.
To select a chip use the --chip <name> flag. This will make the tool filter out any circuit that is not implemented
by the chip. If the flag is not passed then the tool will consider all chips. For ignoring chips instead use the
--ignore-chips <chip[,chip,...]> flag with a comma separated list of chips to ignore.
The type declares what high-level type the circuit is using and can be selected with the --type <name> flag.
Similarly to --chip, not passing this flag makes the tool consider all types. The circuits distinguish by type
because some circuits implement the same instructions for multiple types. For example, the native chip implements
the equality instructions for the native and bit types.
The name describes the functionality the circuit is trying to represent. In general corresponds to methods in
one of the instruction-like traits. Some methods have a variable number of arguments. In cases like that
multiple circuits may be created with different combinations of arguments and the name will contain information
about the combination (i.e. the circuits hash/hash_1/sha256/byte and hash/hash_10/sha256/byte operate on 1 and 10
input values respectively).
You can filter by name with both a whitelist and a blacklist. If the whitelist is passed,
any circuit outside of the list is discarded. And, if the blacklist is passed, then any circuit inside it is discarded.
If neither the whitelist nor the blacklist are set then they have no effect and all circuit names will be considered for the
extraction. Both lists can be configured as comma separated lists passed as arguments to the --method-whitelist and
--method-blacklist flags.
You can combine these flags in any way you want. You can also pass the --list flag to the tool to make it print the
selected circuits instead of extracting them. This is useful for debugging a circuit selection that is not producing the
desired results.
Constants
Some harnesses require a list of literal values that will be used as compile-time constants, representing
off-circuit values in the harness’ input. To pass constants use either the --constants or the --constants-file flags,
but they cannot be used at the same time.
--constants expects a comma separated list of literal values. All types expect their decimal representation with the
exception of bit with expectes either true or false.
--constants-file expects a path to a file containing lines
of comma separated values. These values have the same requirements as the --constants flag.
If a harness requires more constants than supplied extraction will fail.
Output directory structure
The output directory can be selected with the -o flag with picus_files used as a default if the flag is omitted.
The tool writes one Picus file per extracted harness. These files are organized hierarchically
by instruction, name, chip, and type.
For example, the harnesses for equality in the native chip will produce
the following structure.
└── picus_files
    └── equality
        ├── is_equal_to
        │   └── native
        │       ├── bit
        │       │   └── output.picus
        │       └── native
        │           └── output.picus
        └── is_equal_to_fixed
            └── native
                ├── bit
                │   └── output.picus
                └── native
                    └── output.picus
AuditHub
AuditHub is a Veridise service where users can run verification tools such as Picus. Is accesible via both its web UI and CLI. In these sections we will explain how to prepare a project for AuditHub, how to configure the CLI, and how to use it for interacting with AuditHub.
AuditHub CLI
The CLI is a Python 3 program that can be installed with pip.
pip install audithub-client
The CLI needs to be configured before use. To do that go AuditHub’s UI and navigate to Account Settings / API Keys. Follow the wizard to create a new API key and store the given client id and client secret somewhere secure depending on the intended usage of the keys.
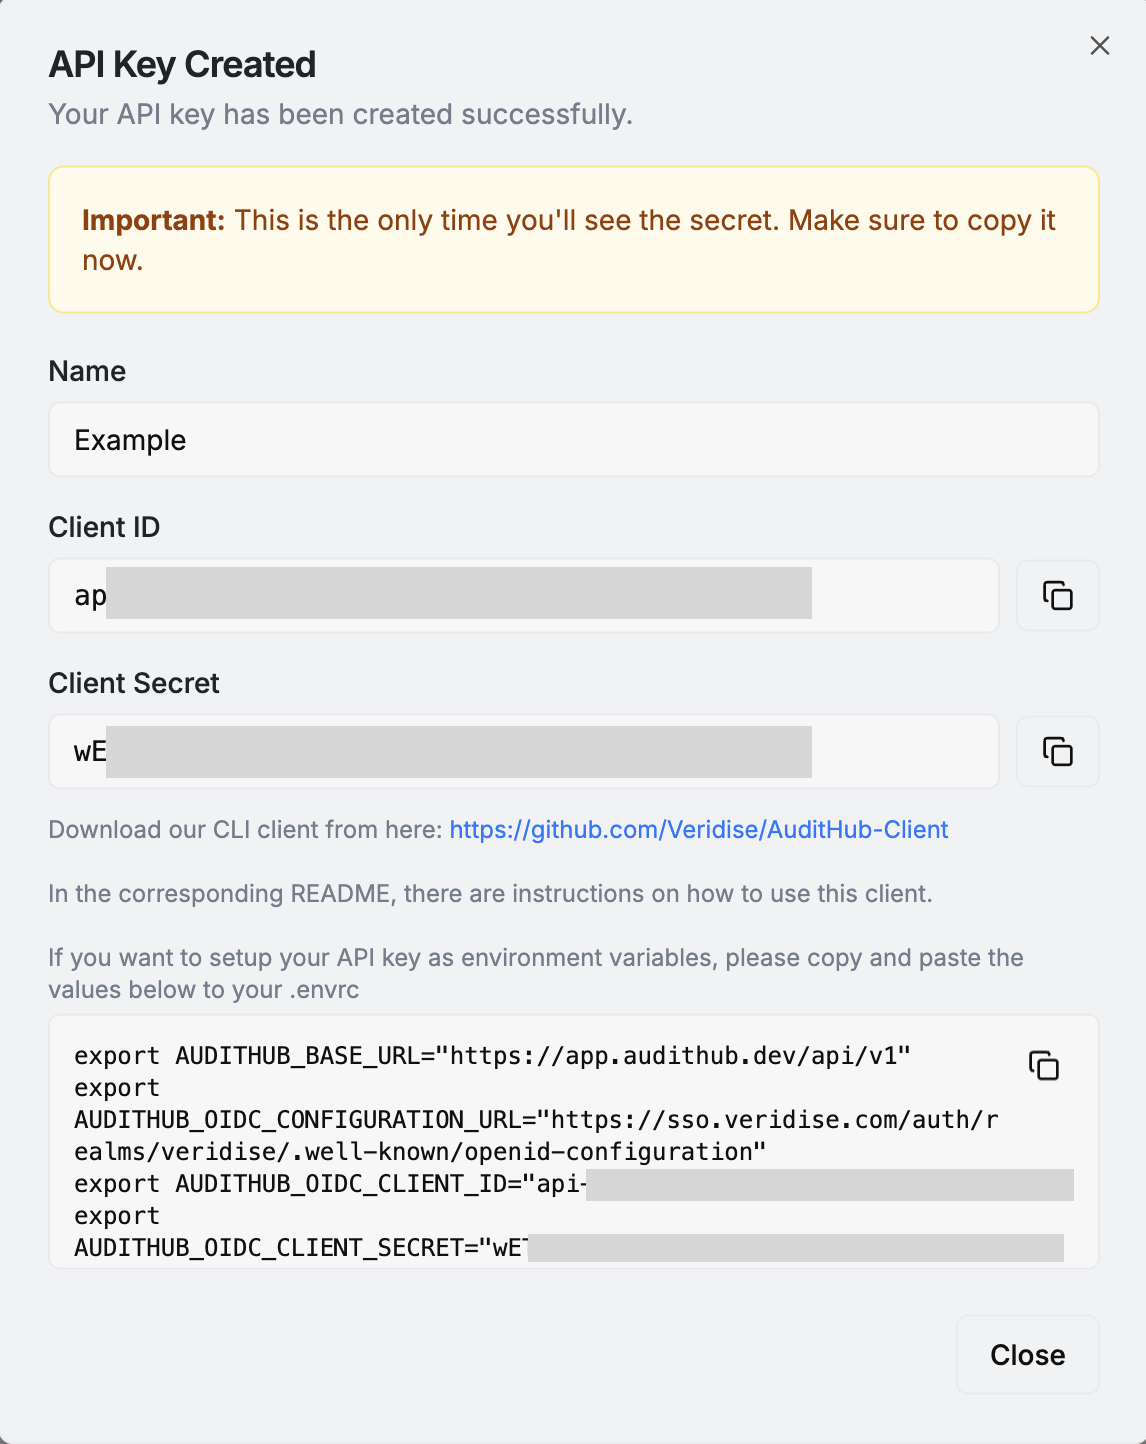
For local use that could be a .envrc file
managed by direnv. For using them in CI that could be Github Secrets accesible
by Github Actions.
Once the keys are ready check the CLI’s documentation on how to configure your system such that the CLI can use the keys to connect to AuditHub.
You can confirm that the CLI is working correctly by running the following
$ ah get-my-profile
{"id": "...", "name": "<Your name>", "email": "<Your email>", "rights": [...], ...}
Creating a new project
Before being able to upload new versions to AuditHub and launch jobs from the CLI it is necessary to create a project
from the UI.
For the first version of the project generate at least some Picus files with midnight-extractor and pack them into a ZIP file.
# For example, generate some Picus files for the equality instructions
midnight-extractor --chip native --type native equality
zip -r picus_files.zip picus_files
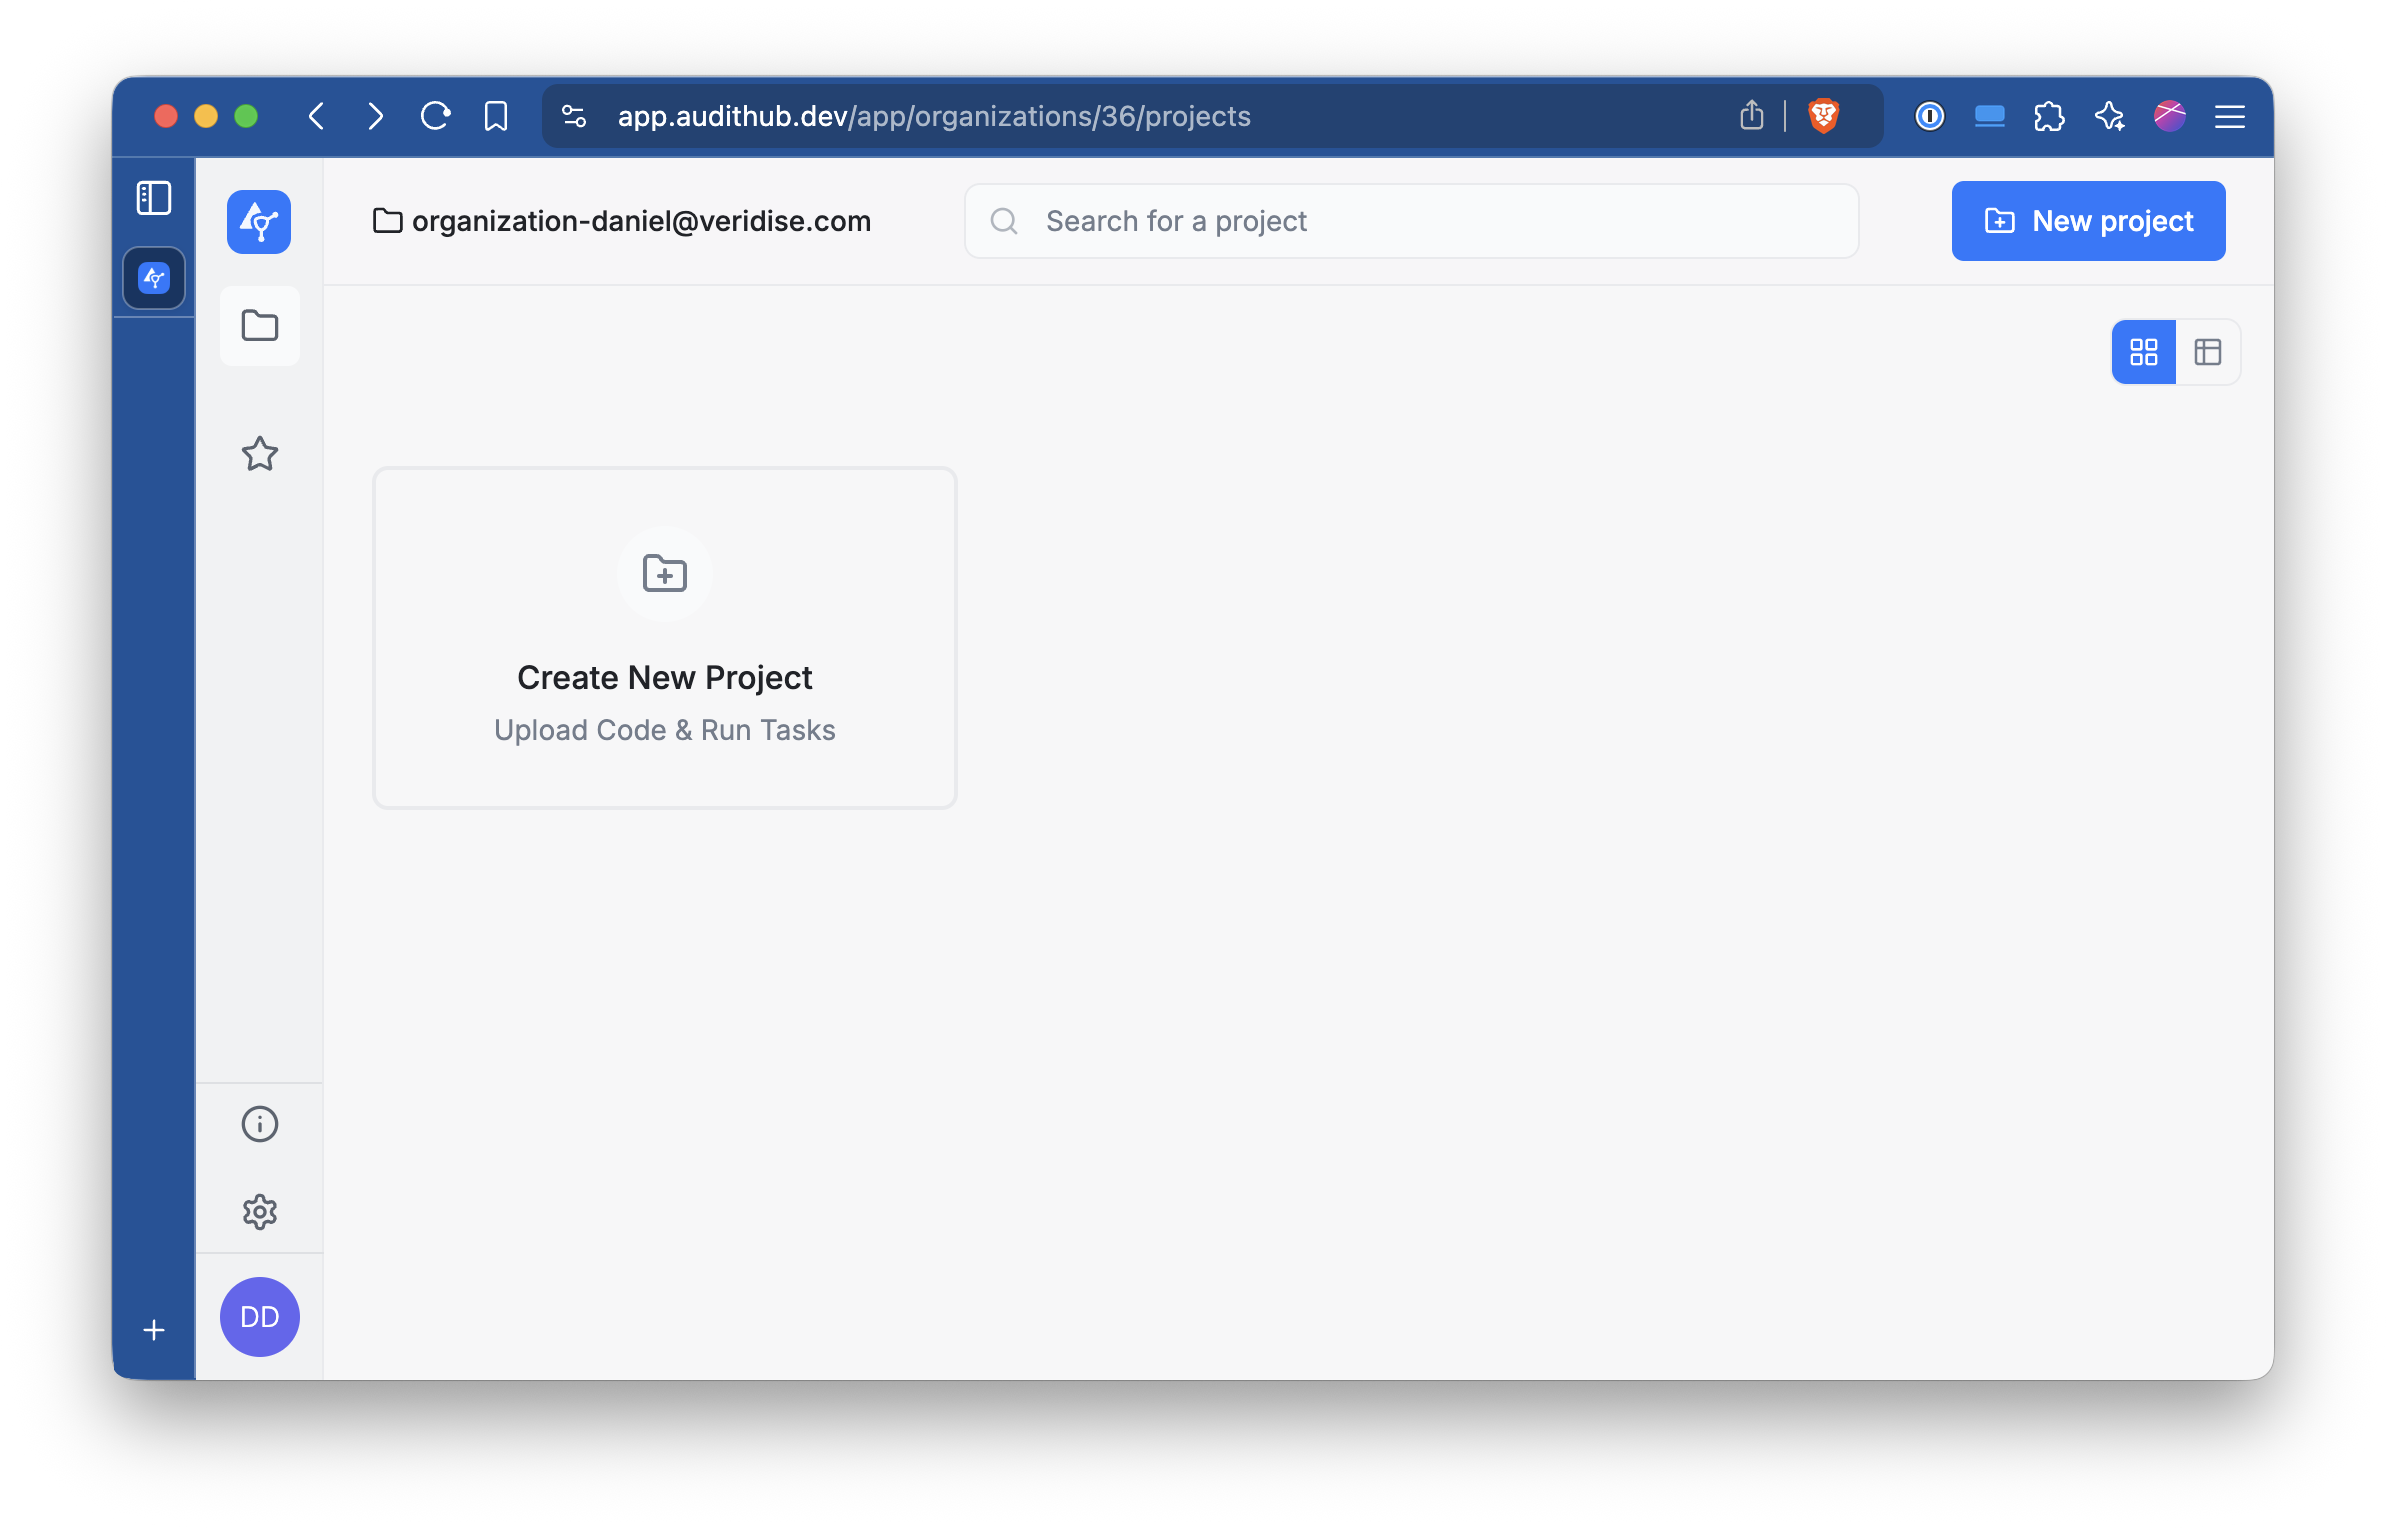
Then go to AuditHub’s UI. Navigate to the organization where you want to create the project and click in Create New Project
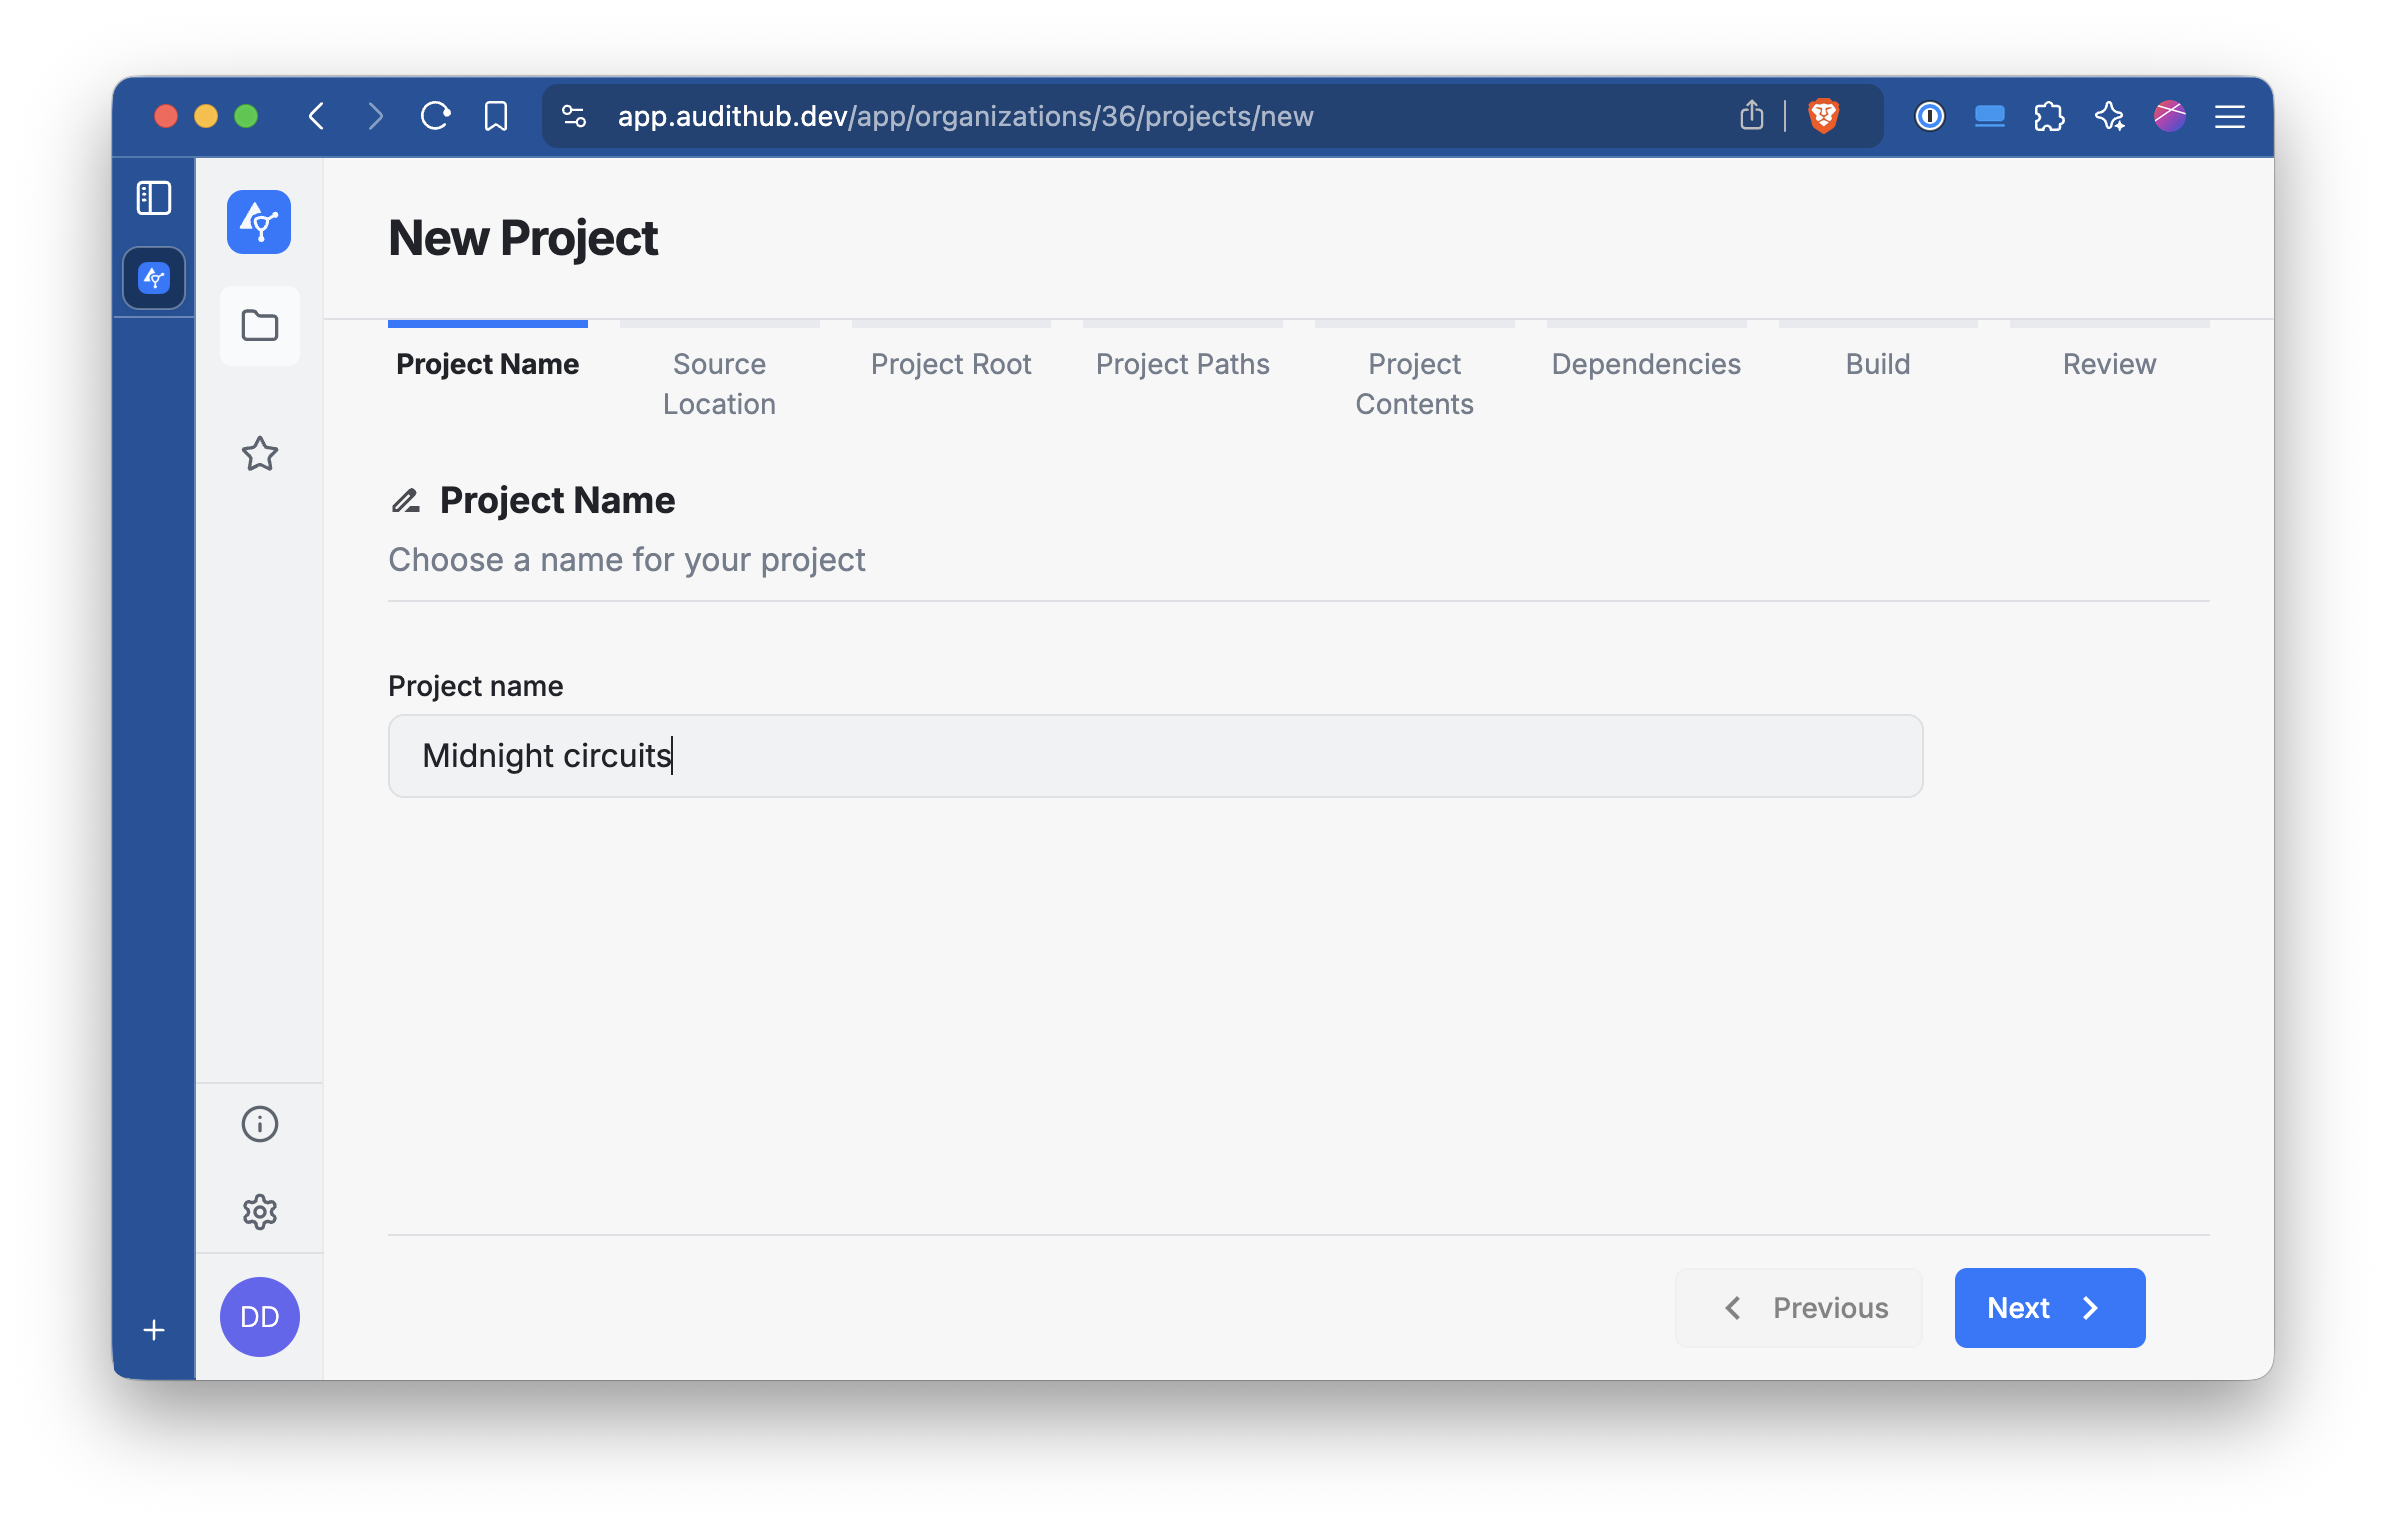
Give to the project a name and click Next.
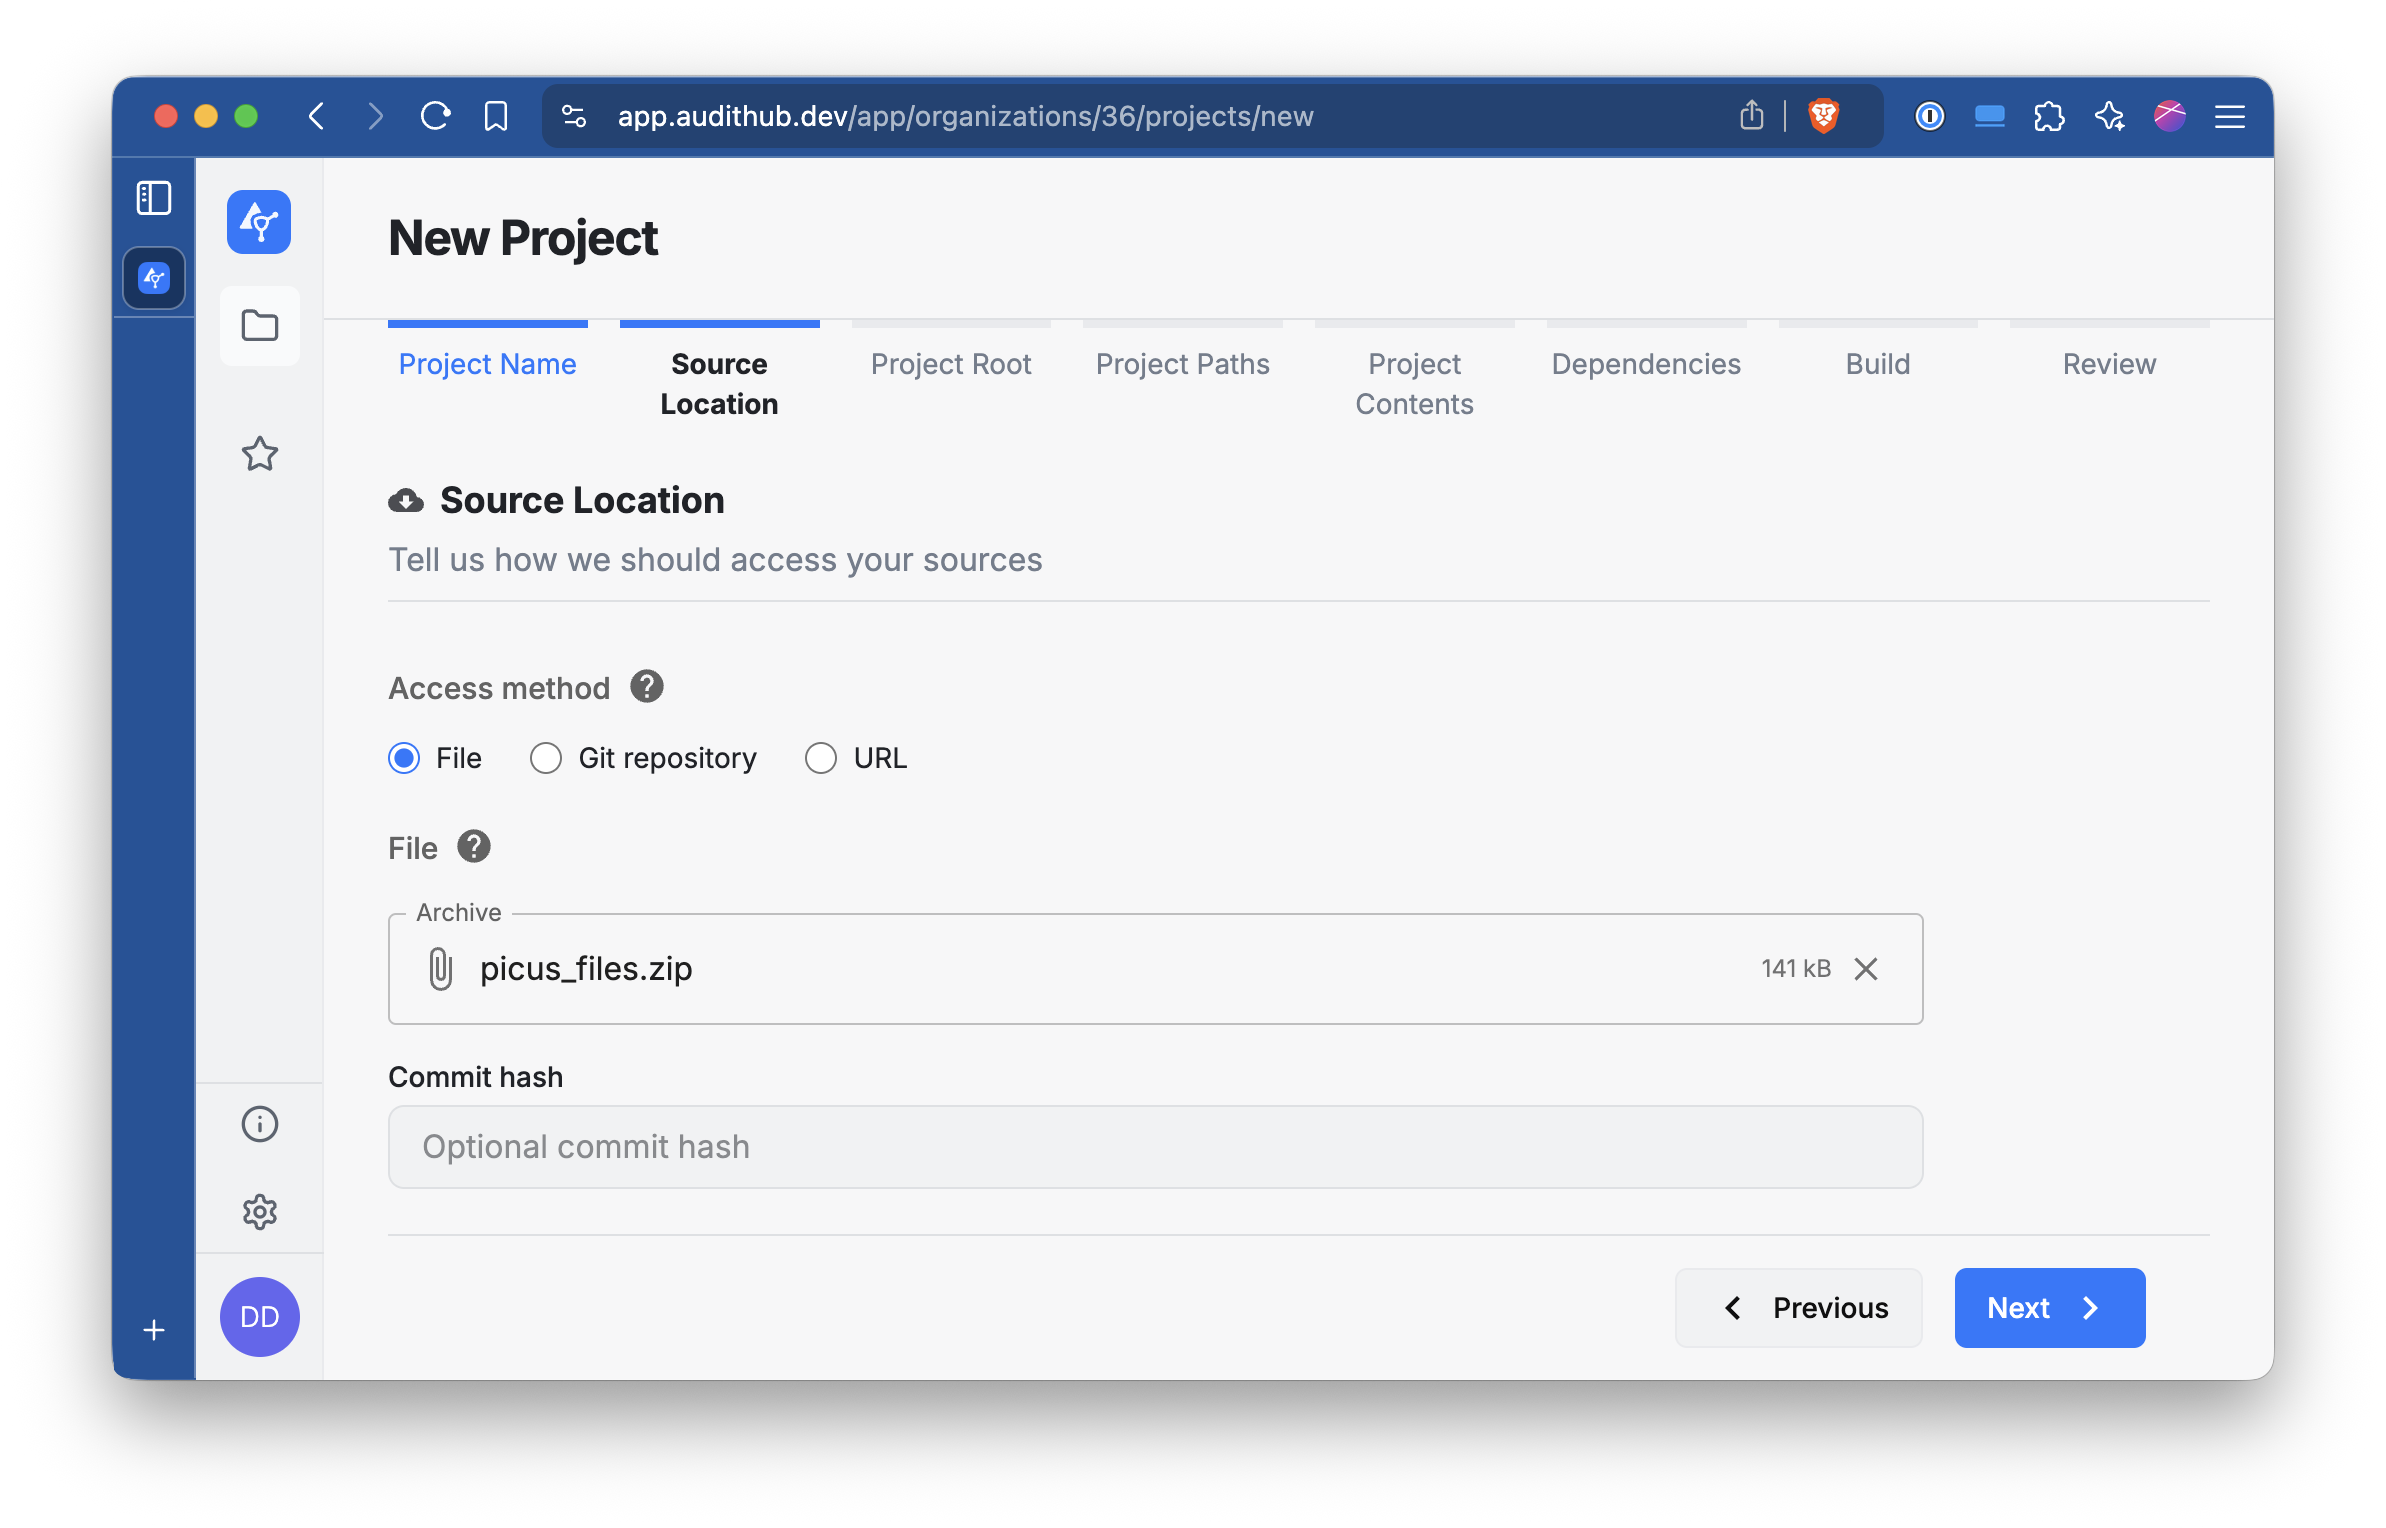
Select the File option and locate the ZIP file we prepared earlier. Once you upload it click Next.
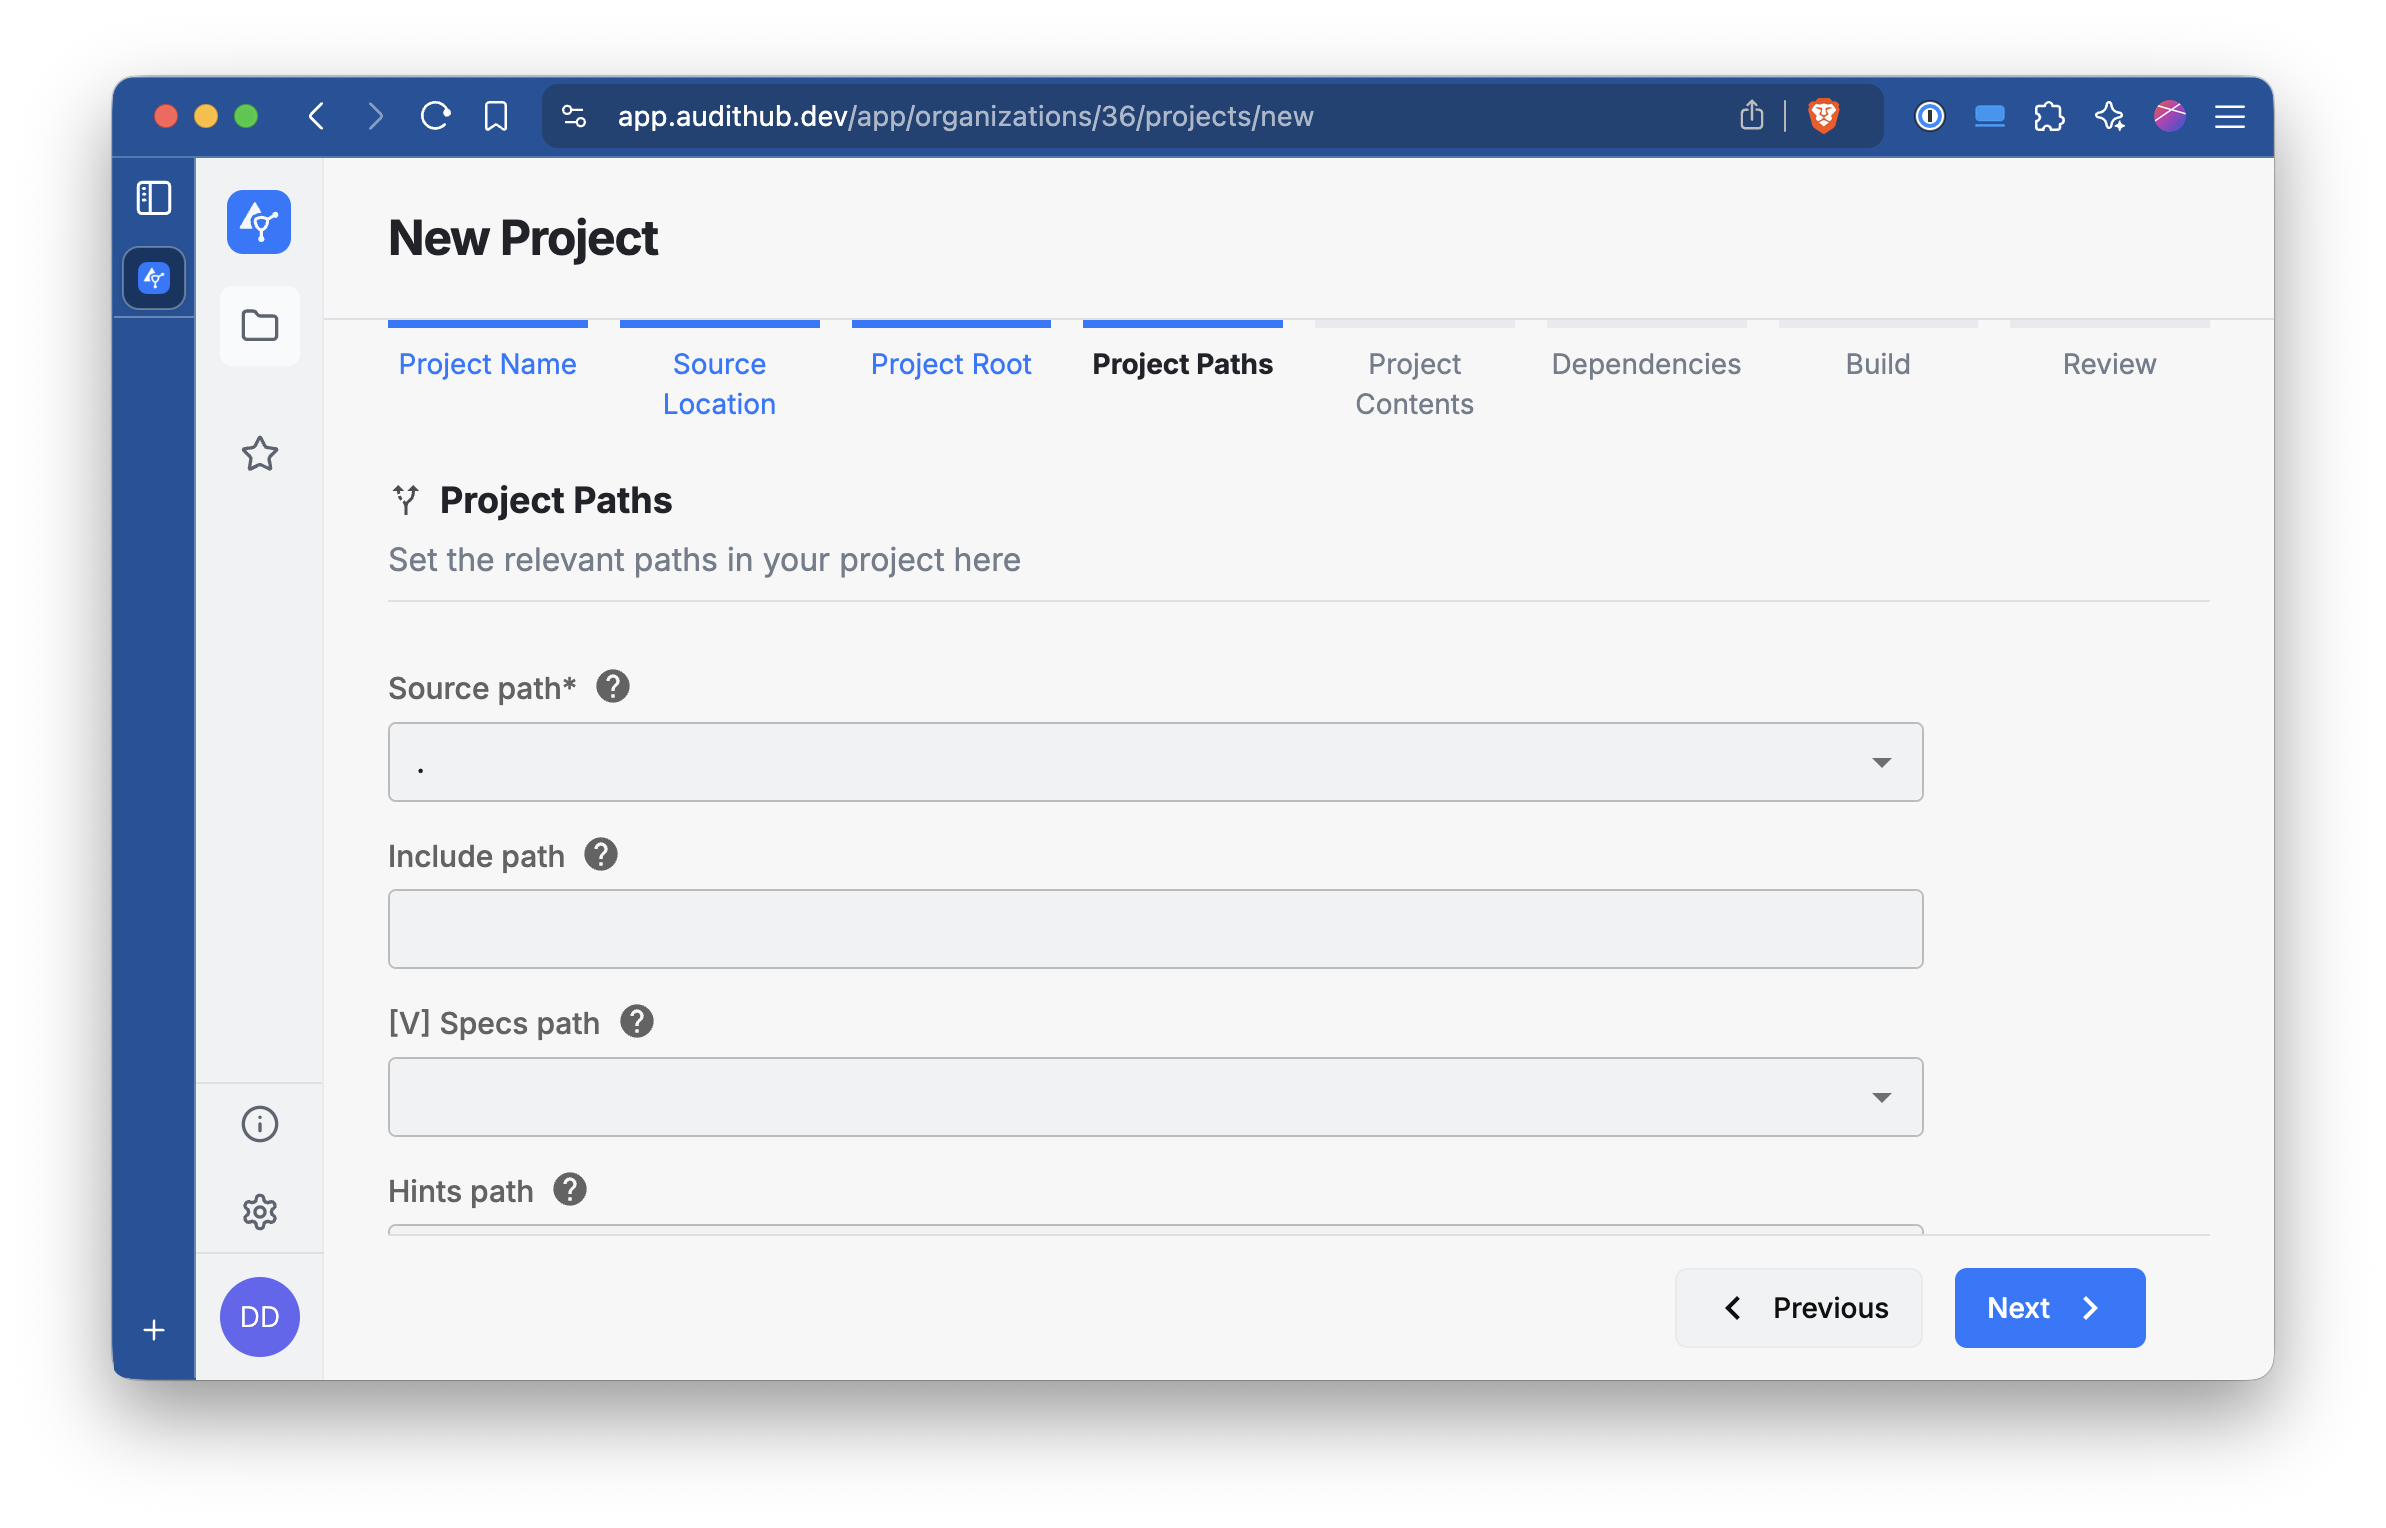
Select Archive root and click Next.

In this section, leave the options as they are and click Next.
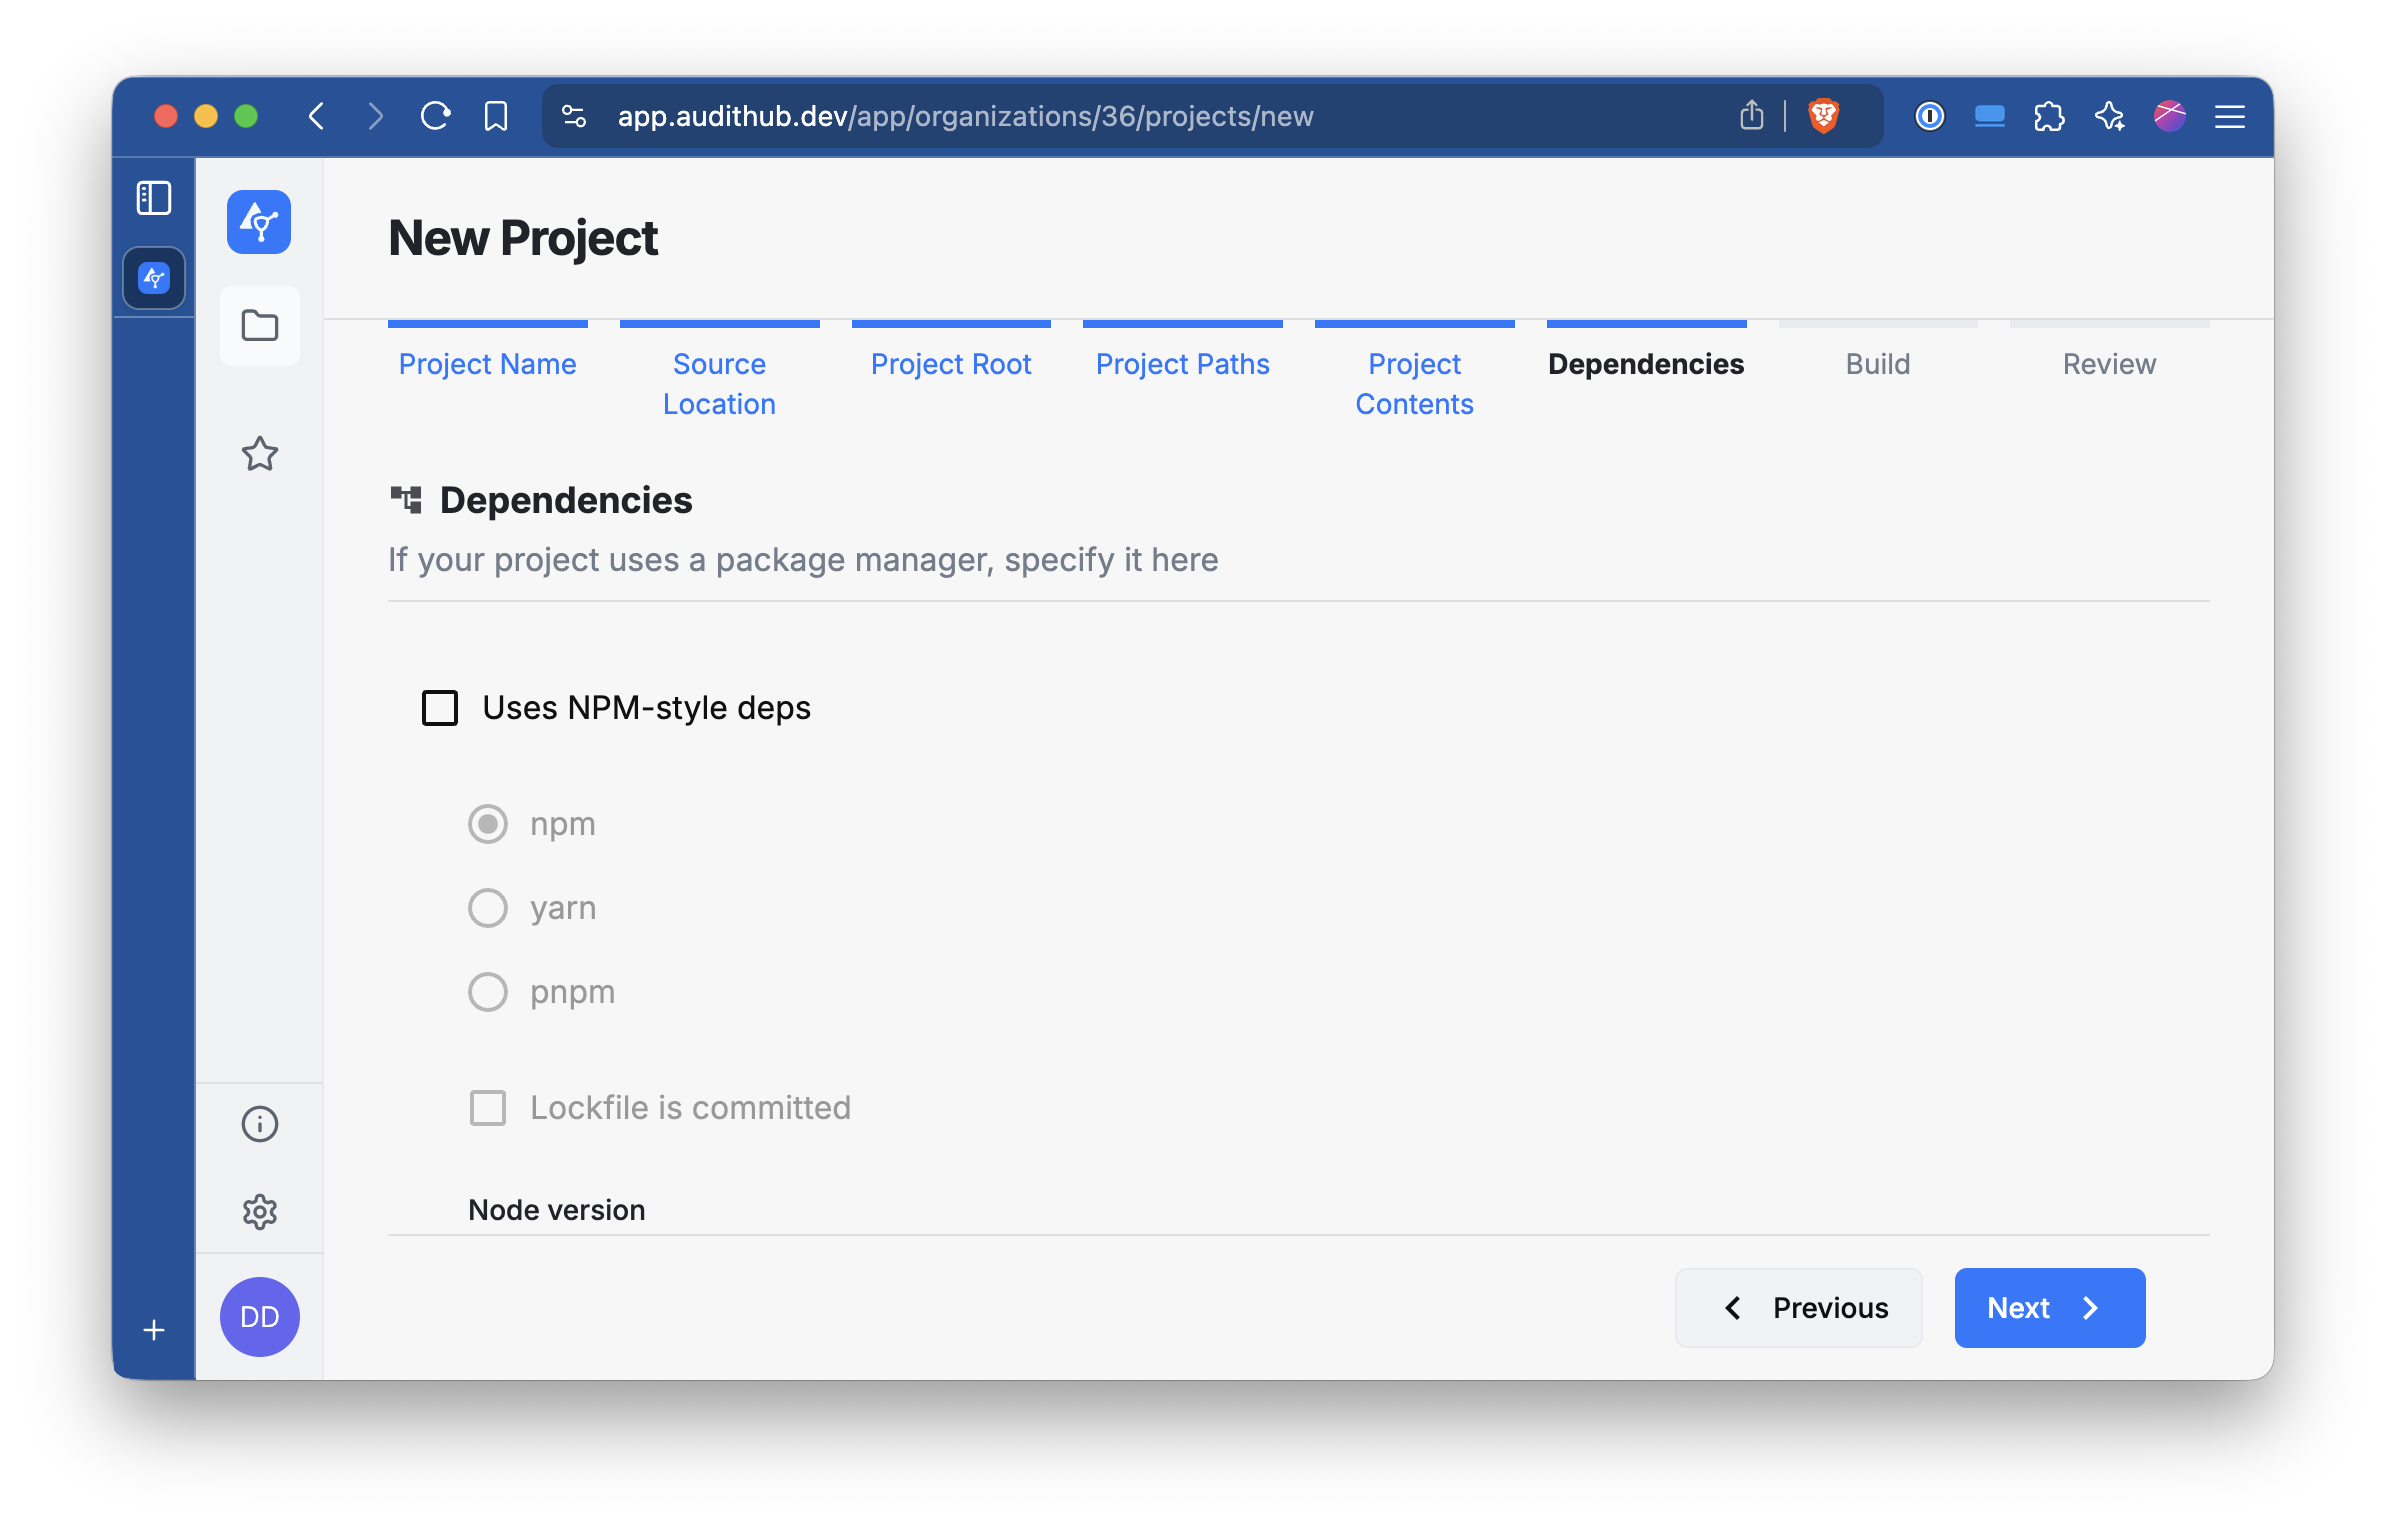
Select Picus files (and optionally LLZK files) and click Next.

Leave the next two sections untouched and just click Next.
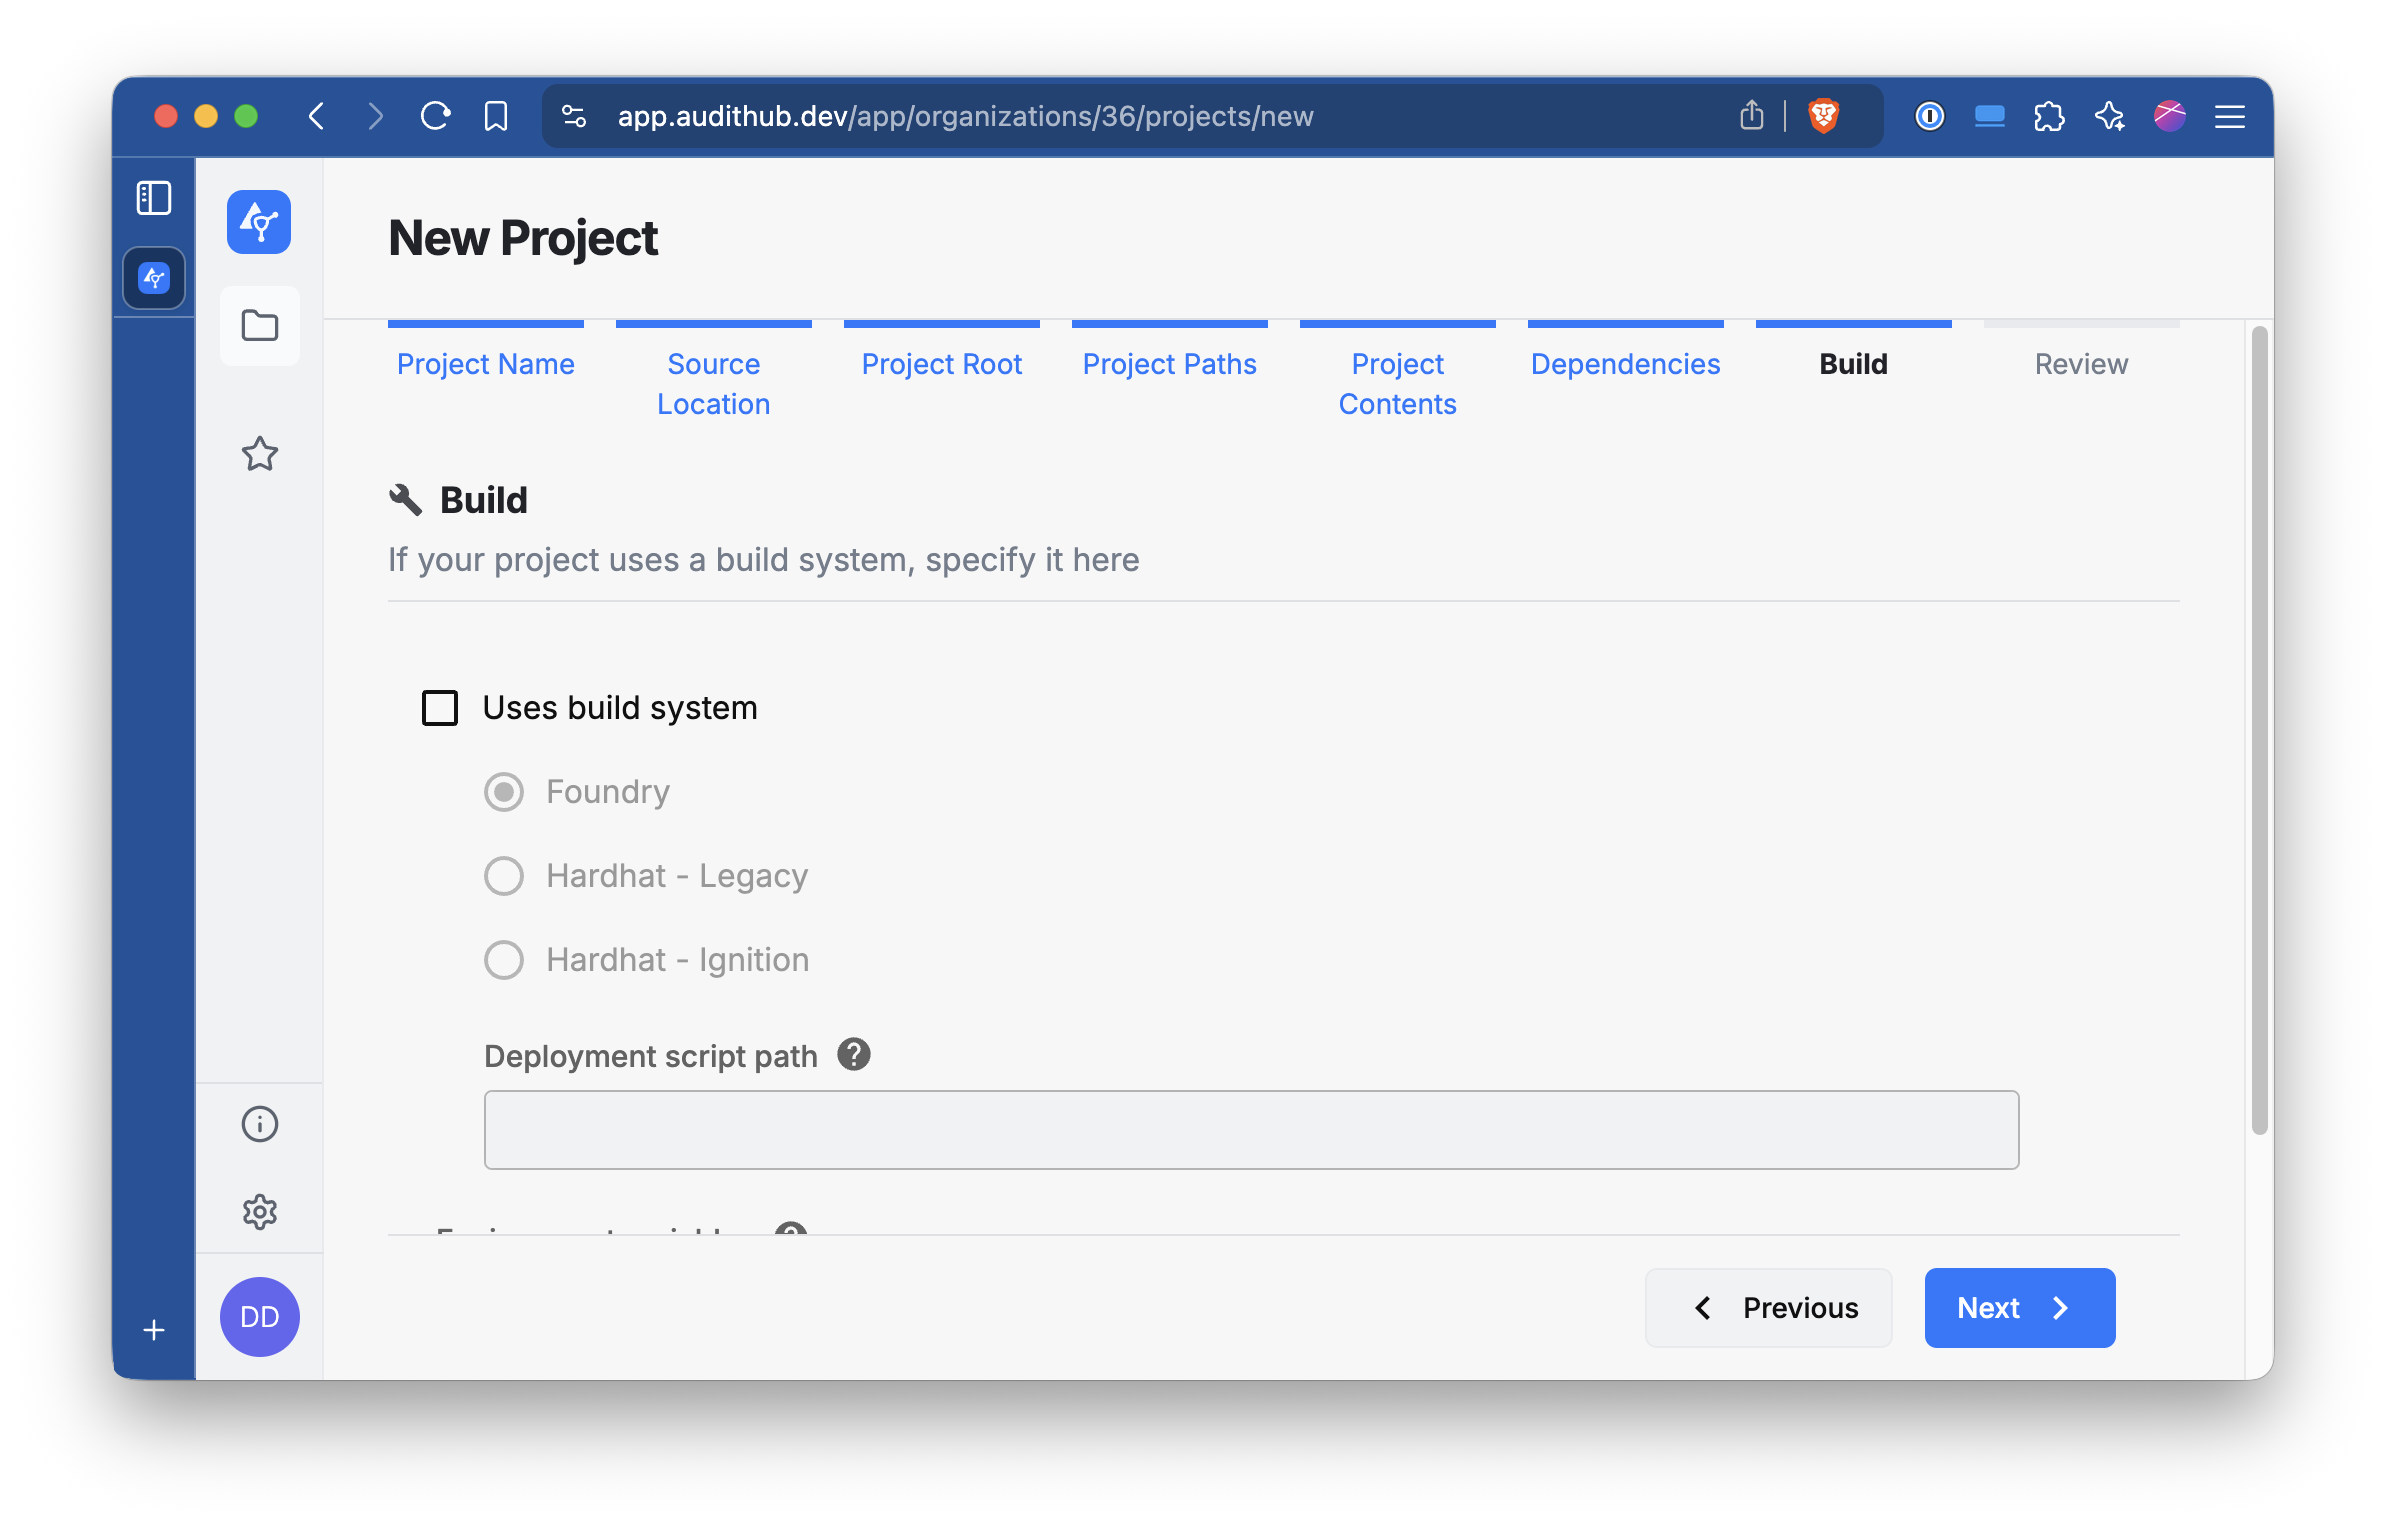
Check that everything looks right and click Submit.
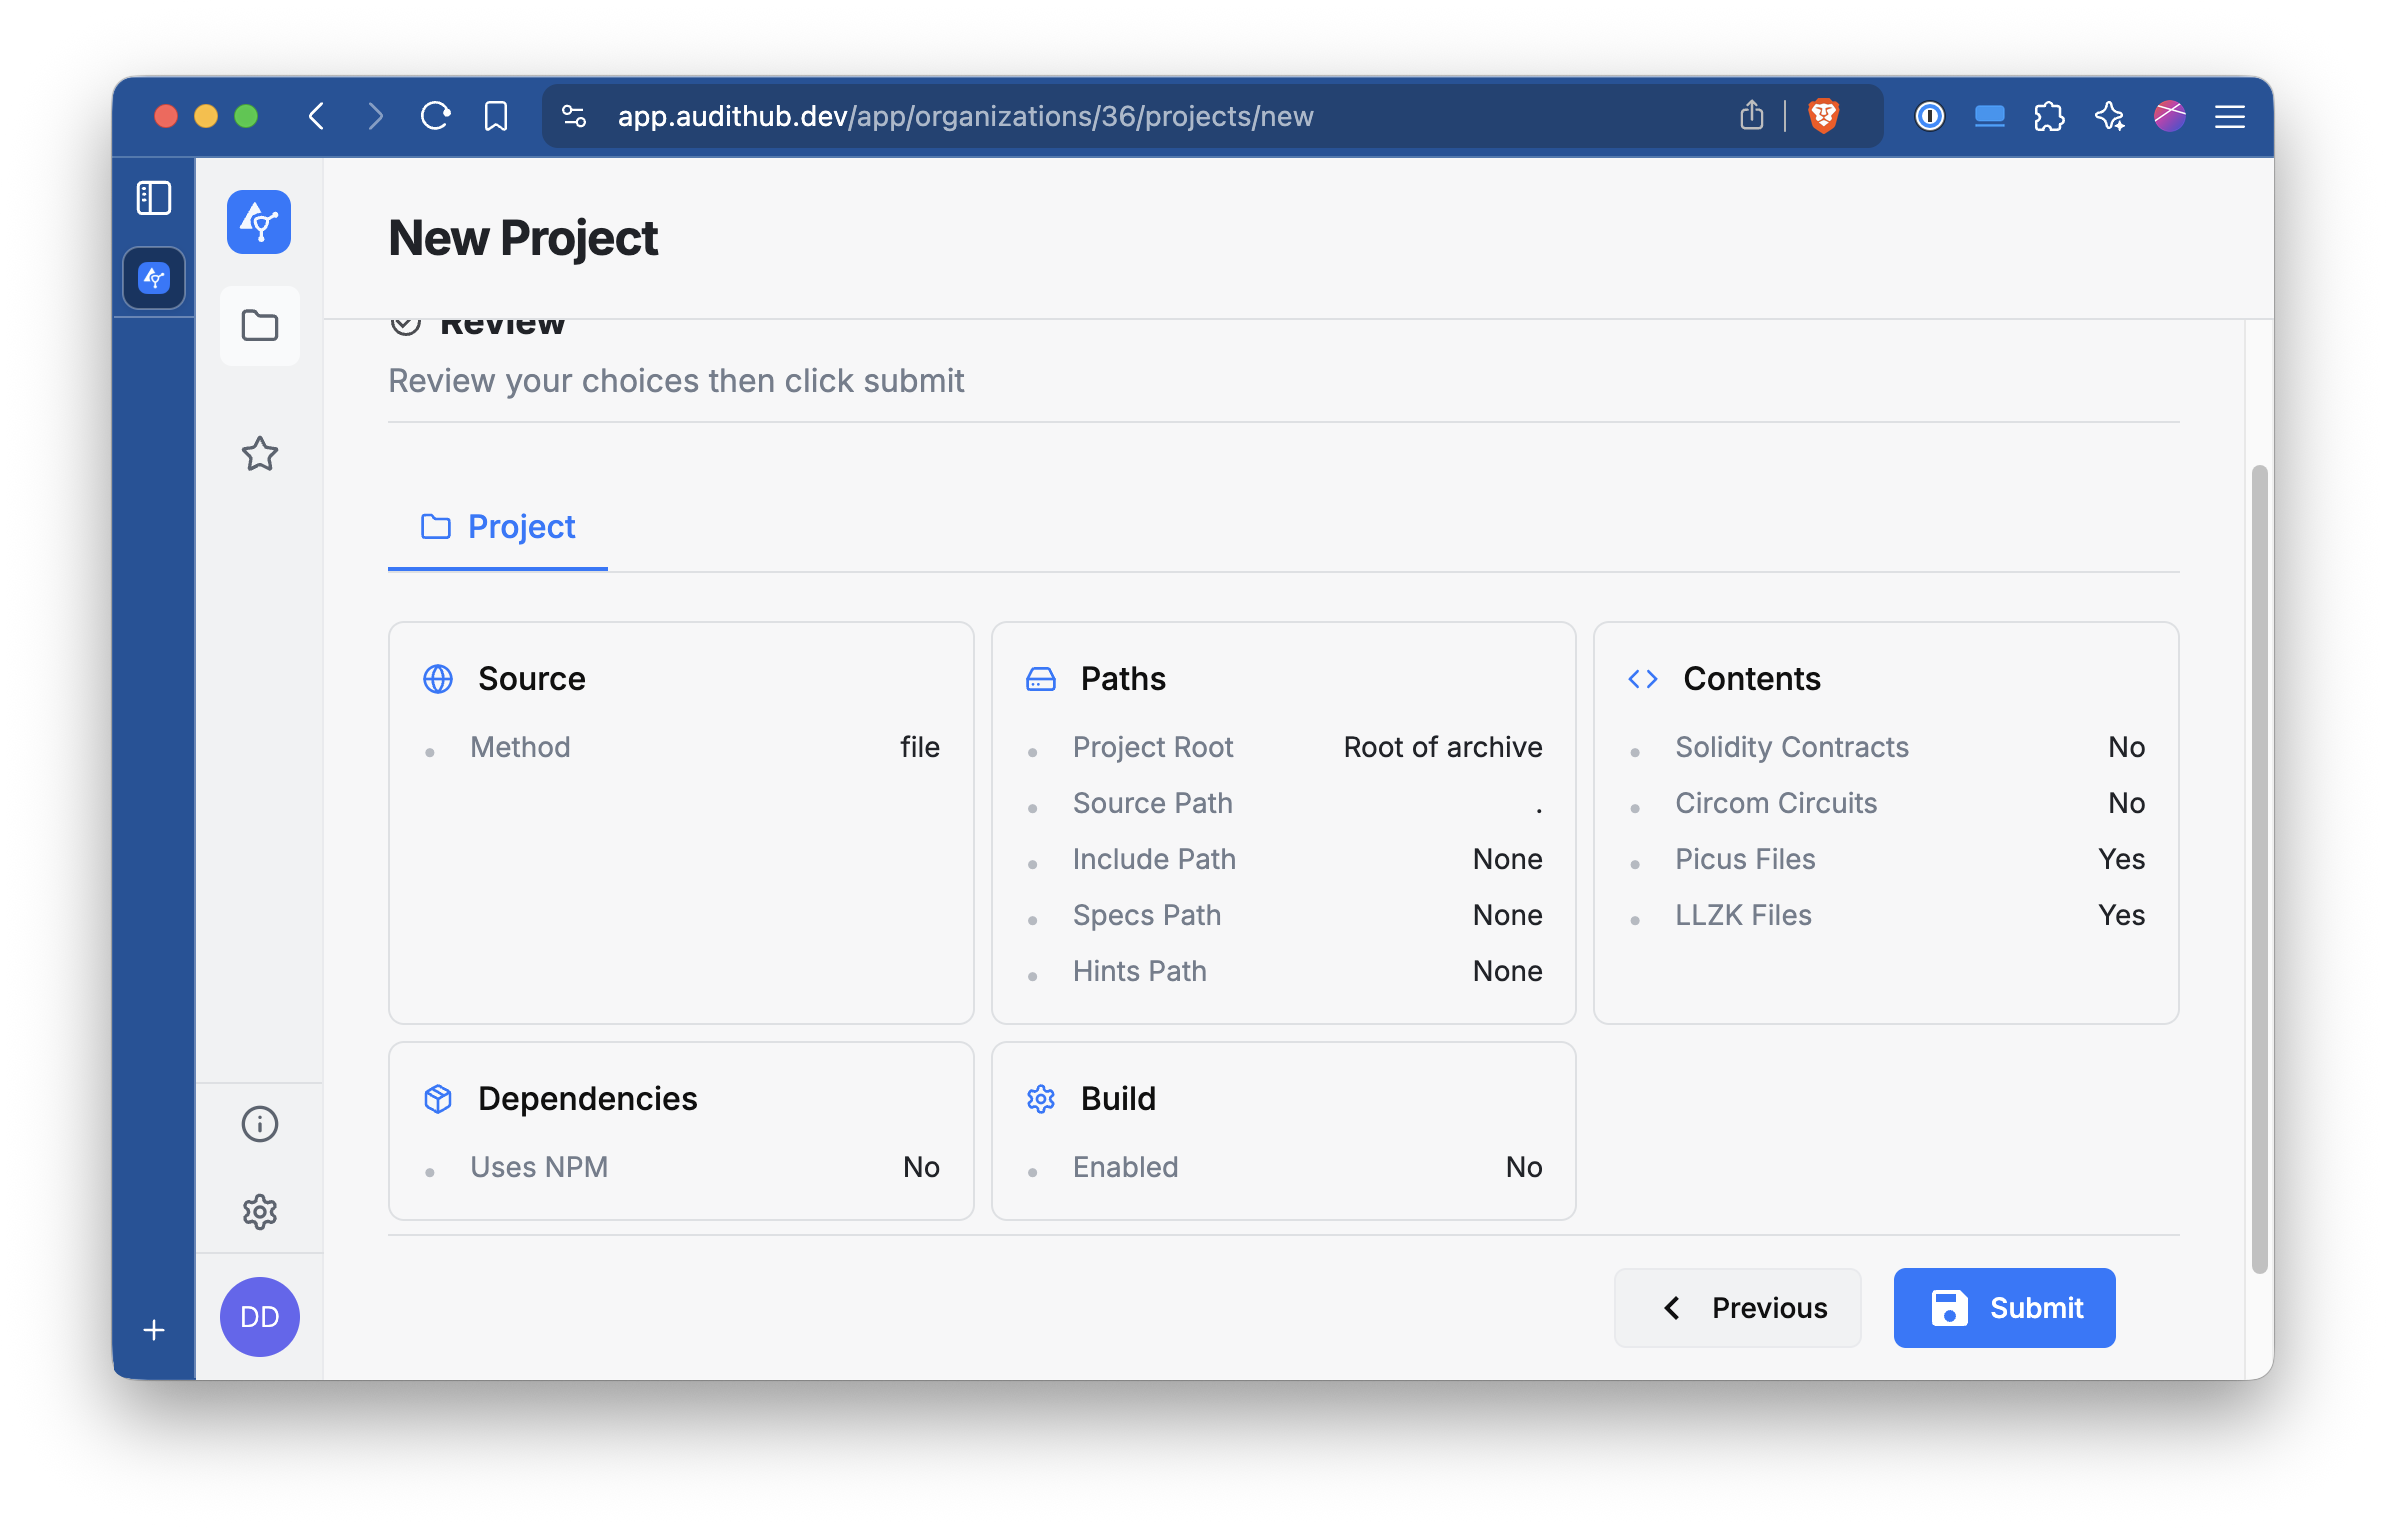
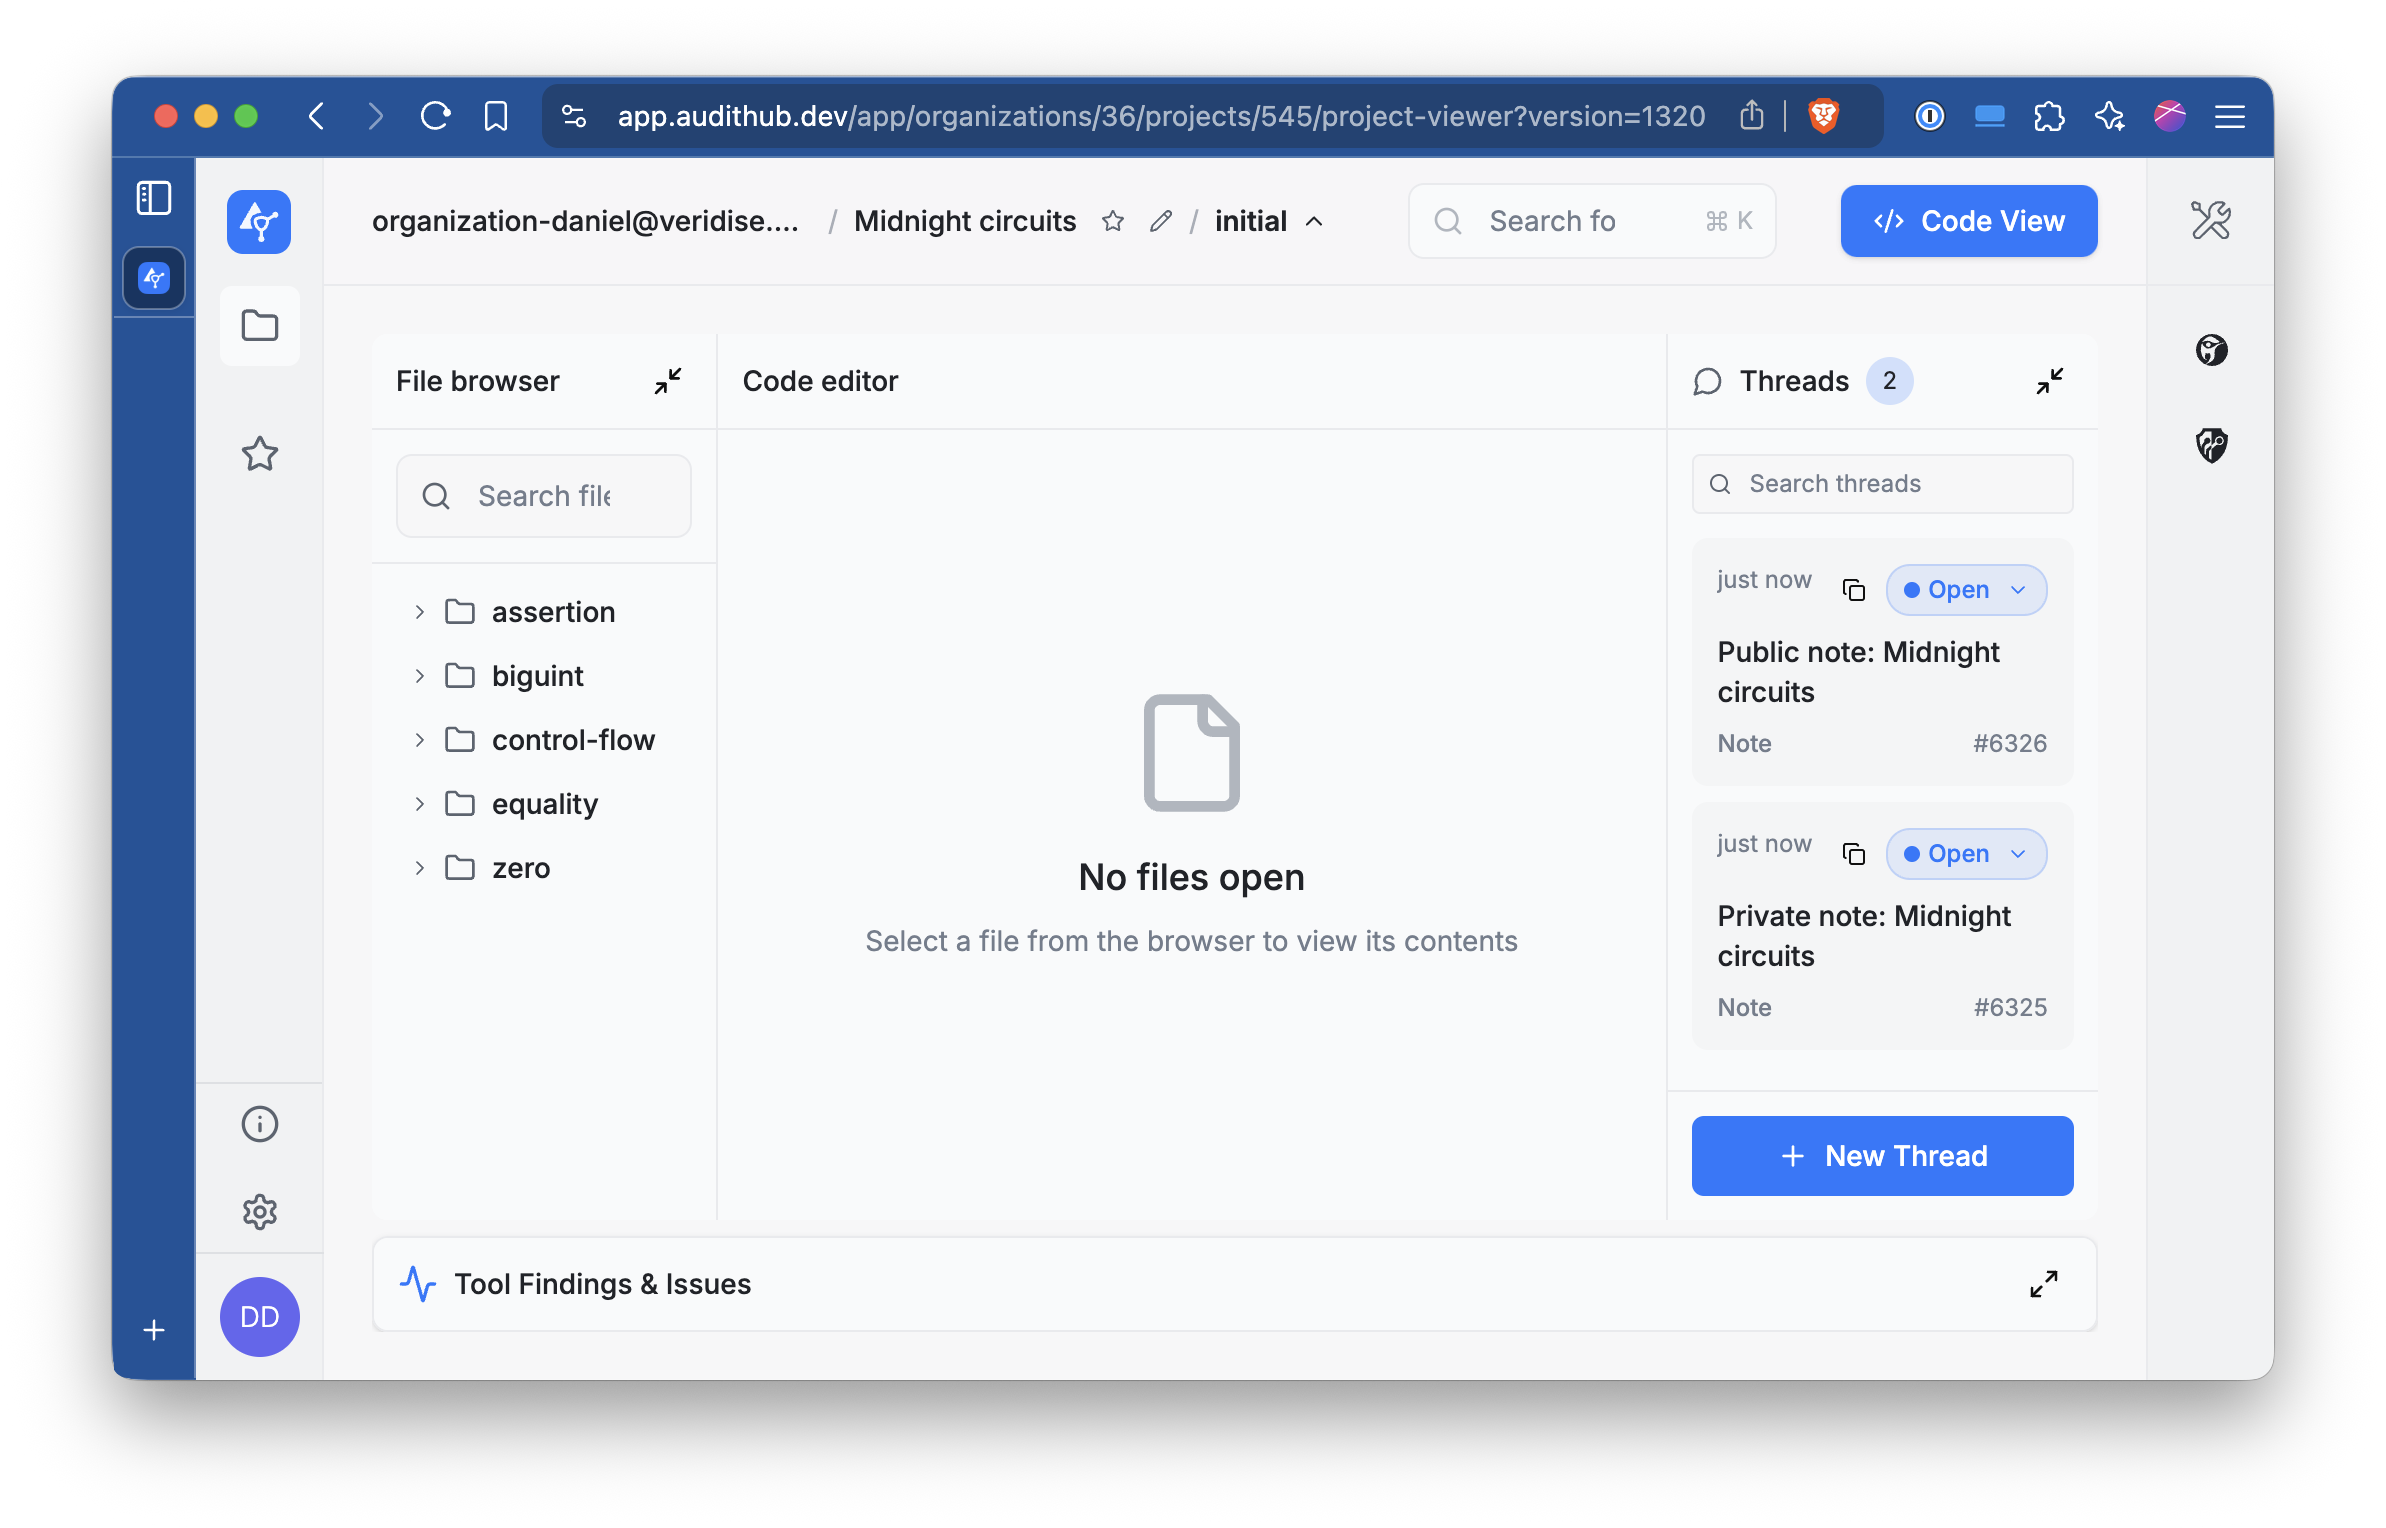
Once the project has been created you will be able to access its main view. For interacting with this
project from the CLI you need to pass the organization and project IDs. In the picture below, note the part
organizations/<number>/projects/<number> of the URL. The first number is the organization ID (36) and the second the project ID (545).
These IDs can be configured as environment variables that the CLI will read.
export AUDITHUB_ORGANIZATION_ID=<organization id>
export AUDITHUB_PROJECT_ID=<project id>
Uploading new versions
Make sure you went through the steps in Creating a new project before continuing.
After extracting a new version of the circuits but before running Picus with them, they need to be uploaded to AuditHub. This can be accomplised with either the UI or with the CLI. In this document we are going to see how to do it with the CLI, that you should have configured already.
Each version needs to have a name. As an example we are going to use the date of submission and the
sha256 of the generated picus files.
Run the following commands, assuming the picus files are in the default output folder (picus_files).
date=$(date "+%Y-%m-%d-%H-%M")
sum=$(find picus_files -type f | sort | xargs cat | sha256sum | head -c 8)
version_id=$(ah create-version-via-local-archive \
    --name "Picus-files-$date-$sum" \
    --source-folder picus_files \
    --project-id $PROJECT_ID \
    --organization-id $ORGANIZATION_ID)
If you configured the AUDITHUB_PROJECT_ID and AUDITHUB_ORGANIZATION_ID environment variables
you can drop the --project-id and --organization-id flags since the CLI can read them from the environment.
Note that we stored the output of the CLI in a variable named $version_id. We need it for identifying the
version when launching jobs.
Launching jobs
Once you have uploaded a version of the extracted circuits to AuditHub you can start running tools with them.
We are going to see how to launch a Picus job from the CLI. Each individual Picus file needs to be run as a separate task. Pick one of the Picus files from a version uploaded to AuditHub and note its path relative to the directory you uploaded it from. This is the path AuditHub will use to locate the file previouly uploaded.
For example, to run a job on one of these files for up to one hour you can run the following command.
# Example path that could be extracted
PICUS_FILE=arithmetic/add/native/native/output.picus
ah start-picus-v2-task \
    --source $PICUS_FILE \
    --version-id $version_id \
    --project-id $PROJECT_ID \
    --organization-id $ORGANIZATION_ID \
    --time-limit 3600000 \
    --empty-assume-deterministic \
    --wait
This will wait until the job has completed in AuditHub. If you don’t pass the --wait flag the CLI returns immediately
with the task ID. This ID can be passed to ah monitor-task -t $task_id for checking the status of the task.
You can run
ah start-picus-v2-task --helpto get more details about the possible flags and arguments.
Similarly to the upload, if you configured the AUDITHUB_PROJECT_ID and AUDITHUB_ORGANIZATION_ID environment variables
you can drop the --project-id and --organization-id flags since the CLI can read them from the environment.
In some cases Picus requires additional configuration;
if you passed the --prelude flag while extracting circuits with either spread
or automaton then you need to pass additional flags. If you are unsure wether the Picus file you want to analyze
was generated using that flag, inspect the first few lines of the file. If the tool injected one of the preludes it
will contain comments indicating it.
Pass the additional flags to the CLI according to the table below.
| Prelude | Additonal Picus flags |
|---|---|
spread | --assume-deterministic Spread,Unspread |
automaton | --assume-deterministic Automaton |
| None | --empty-assume-deterministic |
Writing new harnesses
Add new harnesses in the crates/harnesses crate. That crate is organized by instructions and,
in some cases, by chips or gadgets that implement the instructions.
Conceptually, a harness is a function that receives a chip, a layouter, some inputs, and returns a Result.
In reallity a harness is a function with a more abstract signature, but that complexity is usually managed by a macro
that allows for a more declarative approach. However, if the macro is not an option see the section below
on how to write harnesses from scratch.
Writing declarative harnesses
A harnesses written declaratively has the following structure.
// The harnesses are NOT parametrized by a field
// but we use an alias for readibility.
use mdnt_extractor_core::fields::Blstrs as F;

// Sets the harness name for the function below.
#[entry("control-flow/select/native/native")]
// Marks the function as a harness
#[harness]
pub fn select_native(
    // The first argument is the chip, a &-reference to a type that implements
    // `CircuitInitialization`.
    chip: &NativeChip<F>,
    // The second argument is the layouter. The actual layouter variable is not a
    // `impl Layouter<F>`. This is syntactic sugar for a namesake variable that
    // implements `midnight_proofs::circuit::Layouter`. So the result is the same.
    layouter: &mut impl Layouter<F>,
    // The third argument are the inputs, whose type must implement `LoadFromCells`.
    (cond, a, b): (AssignedBit<F>, AssignedNative<F>, AssignedNative<F>),
    // Optional fourth argument that allows injecting additional IR for aiding verification.
    injected_ir: &mut InjectedIR<RegionIndex, Expression<F>>
    // The output must be a Result<T, Errot> where T is a type that implements `StoreIntoCells`.
) -> Result<AssignedNative<F>, Error> {
    // Runs the target method.
    chip.select(layouter, &cond, &a, &b)
}
And that’s it. The list of harnesses is defined automatically at compile time and
can be obtained by calling the mdnt_harnesses::harnesses function.
The extractor uses that function for selecting what harnesses need to be extracted.
The macros do a lot of heavy lifting in converting this form to how the harnesses look internally.
The #[entry("...")] macro registers the function in the list of harnesses. This registration is actually accomplised
with mdnt_extractor_core::entry! and in some cases is actually better to use this macro instead of #[entry].
For example, when a harness is parametrized by a constant parameter for selecting the size of some arrays.
entry!("bar/example_10/foo/native", example::<10>);
entry!("bar/example_20/foo/native", example::<20>);
#[harness]
pub fn example<const N: usize>(
    chip: &FooChip<F>,
    layouter: &mut impl Layouter<F>,
    arr: [AssignedNative<F>; N]
) -> Result<AssignedNative<F>, Error> {
    chip.foo(layouter, &arr)
}
The harness macro family has 6 macros that can be used for declaring harnesses and offer some flexibility for covering most cases.
For most chips (the ones where CircuitInitialization::Args == ()) use the macros harness, harness_mut, or unit_harness.
The first macro is the one we saw above already. harness_mut is similar to harness but the first
argument (the chip argument)
must be a &mut-reference instead. unit_harness is for methods that don’t have a return value (Result<(), Error>). To use
this
macro split the inputs of the function into two sets and pass them as the third and fourth argument. The 4th argument can be
considered the output and additional constraints can be injected for aiding Picus with verification. That argument, however,
is not encoded as a Picus output. Is just a separation for readability. In these cases a vacuous output is generated
that is constrained to be equal to 0. If you need to inject IR in a unit_harness you can access the injector via
the fifth optional argument.
If the target chip CircuitInitialization::Args != () then you need to use harness_with_args, harness_with_args_mut, or
unit_harness_with_args. These macros work identically to their counterparts but require declaring the type of
CircuitInitialization::Args (i.e. #[harness_with_args(usize)]). To provide the arguments you need to define a function that has
the same name as the harness function followed by _args (i.e. foo would be foo_args). That function cannot take any
arguments and return a value of the declared type.
Since the most common argument type is usize we include a convenience macro #[usize_args(<usize>)] that automatically creates
the function with the correct name and returns the value passed as argument to the macro.
All the macros accept an optional argument with an expression of type LookupCallbacks that allows defining custom behaviors
to handle lookups. For example, a
harness like the first one but for NativeGadget instead needs to handle the range lookup the gadget uses. For that we can
do as follows:
#[entry("control-flow/select/native-gadget/native")]
// The range_lookup function creates the appropiate handler for the lookup.
#[harness(range_lookup(8))]
pub fn select_native(
    chip: &NG<F>,
    layouter: &mut impl Layouter<F>,
    (cond, a, b): (AssignedBit<F>, AssignedNative<F>, AssignedNative<F>),
) -> Result<AssignedNative<F>, Error> {
    chip.select(layouter, &cond, &a, &b)
}
Writing harnesses from scratch
If the macros shown above do not fit the needs of a new harness they can still be defined by hand. Below is an annotated version of the kind of code the macros generate that can serve as a starting point for creating a harness from scratch.
entry!("control-flow/select/native-gadget/native", select_native);
fn select_native(ctx: &Ctx) -> anyhow::Result<Output> {
    // The actual logic of the harness needs to be wrapped into a trait.
    // So we need to create a type for that.
    struct Circuit<'s, 'c>(PhantomData<(&'s (), &'c ())>);

    // This trait defines the types that the harness uses.
    // The extractor will rely on this trait for finding the right types for
    // creating the right final circuit.
    impl<'s, 'c> AbstractCircuitIO for Circuit<'s, 'c> {
        // The chip type. It must implement CircuitInitialization but is not enforced.
        type Chip = NativeChip<F>;

        // The type of the inputs. Must implement `LoadFromCells` and if the method takes several
        // they can be grouped in tuples up to 12 elements.
        type Input = (AssignedBit<F>, AssignedNative<F>, AssignedNative<F>);

        // The type of the outputs. Same as the inputs but must implement the
        // `StoreIntoCells` trait instead.
        type Output = AssignedNative<F>;

        // These two types need to be the same as their namesakes in CircuitInitialization.
        type Config = <NativeChip<F> as CircuitInitialization<ExtractionLayouter<'s, 'c, F>>>::Config;

        type ConfigCols =
            <NativeChip<F> as CircuitInitialization<ExtractionLayouter<'s, 'c, F>>>::ConfigCols;
    }

    // The actual logic is defined with this trait.
    // `harness_mut` will use `AbstractCircuitMut`
    impl AbstractCircuit<F> for Circuit<'_, '_> {
        fn synthesize<L>(
            &self,
            chip: &Self::Chip,
            layouter: &mut L,
            (cond, a, b): Self::Input,
            _: &mut InjectedIR<
                RegionIndex,
                Expression<F>,
            >,
        ) -> anyhow::Result<Self::Output, Error>
        where
            L: Layouter<F>,
        {
            chip.select(layouter, &cond, &a, &b)
        }
    }

    // If the chip arguments is () then this trait can be used.
    impl NoChipArgs for Circuit<'_, '_> {}

    // The type we created and implemented the types for can be passed to this
    // type. This type handles the linking between the inputs, outputs, and the harness logic.
    let ci: CircuitImpl<'_, F, Circuit, Function> =
        CircuitImpl::new(ctx, Circuit(Default::default()));
    // The first argument of this method is a type that implements the
    // `CircuitSynthesis` trait, which is Haloumi's counterpart to the Circuit trait in Halo2.
    // The types and traits above handle most of the boilerplate and help keep the harnesses more readable.
    // However, the only trait the frontend needs is `CircuitSynthesis` so other approaches are possible so long
    // they implement that trait.
    //
    // The second argument is an optional &dyn-reference to a LookupCallbacks implementation.
    // These callbacks are invoked when the circuit has lookups for getting the IR that needs to be
    // generated for handling the lookup.
    ctx.lower_circuit(ci, None)
}
Supporting new chips
In order to use user defined chips or gadgets in a harness it is necessary to implement a trait that makes it compatible with the extraction system.
Let’s do a small refresher on why this is necessary. A harness can be defined as follows.
#[entry("control-flow/select/native/native")]
#[harness]
pub fn select_native(
    chip: &NativeChip<F>,
    layouter: &mut impl Layouter<F>,
    (cond, a, b): (AssignedBit<F>, AssignedNative<F>, AssignedNative<F>),
) -> Result<AssignedNative<F>, Error> {
    chip.select(layouter, &cond, &a, &b)
}
This harness targets the NativeChip. When the extractor attempts to extract the harness it needs to know
some things about this chip, but it doesn’t know what the NativeChip is. This information is obtained via the
CircuitInitialization trait.
This trait, similar in nature to Halo2’s Circuit trait, enables the extractor to configure and create chips that implement it.
Let’s consider the following chip as an example.
struct FooConfig {
    advice: [Column<Advice>; ADVICE_WIDTH],
    fixed: [Column<Fixed>; FIXED_WIDTH],
    table: [TableColumn; TABLE_WIDTH]
}

struct FooChip<F> {
    config: FooConfig,
    native: NativeChip<F>
}

impl<F: PrimeField> FooChip<F> {
    fn configure(meta: &mut ConstraintSystem<F>) -> FooConfig {
        // Create an instance of the config...
    }

    fn new(config: FooConfig, native: NativeChip<F>) -> Self {
        Self { config, native }
    }

    fn load_table(&self, layouter: impl Layouter<F>) -> Result<(), Error> {
        // Loads the lookup table...
    }
}
The example chip has a lookup table and depends on NativeChip, which already implements the trait we are going to implement.
The trait is parametrized in L, that we can use as an implementation of a Layouter.
impl<F, L> CircuitInitialization<L> for FooChip<F>
where
    F: PrimeField,
    L: Layouter<F>,
{
    // Type that is generated from the ConstraintSystem, usually the Chip's config.
    type Config = (FooConfig, <NativeChip<F> as CircuitInitialization<F>>::Config);

    // Any external arguments the chip may need. If the chip does not have any then
    // an empty tuple is sufficient.
    type Args = ();

    // Any type that is part of the configuration that could be potentially shared with other chips.
    // FooChip does not have any of that in this case so we just put NativeChip's.
    type ConfigCols = <NativeChip<F> as CircuitInitialization<F>>::ConfigCols;

    // These two types are required because mdnt-support does not have a dependency on any
    // halo2 library. We need to declare what types are used as ConstraintSystem and as Error.
    // Usually these will be the types `<halo2-crate>::plonk::{ConstraintSystem, Error}`.
    type CS = ConstraintSystem<F>;
    type Error = Error;

    /// Initializes a new chip with the given config and arguments, if any.
    fn new_chip((config, native_config): &Self::Config, _: Self::Args) -> Self {
        Self::new(config, NativeChip::new_chip(native_config, ()))
    }

    /// Creates a new configuration.
    fn configure_circuit(
        meta: &mut Self::CS,
        config_cols: &Self::ConfigCols,
    ) -> Self::Config {
        (Self::configure(meta), NativeChip::configure_circuit(meta, config_cols))
    }

    /// Performs any required loading, such as lookup tables.
    /// This method is called by the extractor after the harness' method has been executed.
    fn load_chip(&self, layouter: &mut L, (_, native_config): &Self::Config) -> Result<(), Self::Error> {
        self.load_table(layouter)?;
        self.native.load_chip(layouter, native_config)
    }
}
After implementing this trait the type can be used as the chip argument in any harness.
Supporting new assigned types
In order to use user defined types as inputs or outputs in a harness it is necessary to implement traits that make the type compatible with the extraction system.
Let’s do a small refresher on why this is necessary. A harness can be defined as follows.
#[entry("control-flow/select/native/native")]
#[harness]
pub fn select_native(
    chip: &NativeChip<F>,
    layouter: &mut impl Layouter<F>,
    (cond, a, b): (AssignedBit<F>, AssignedNative<F>, AssignedNative<F>),
) -> Result<AssignedNative<F>, Error> {
    chip.select(layouter, &cond, &a, &b)
}
In this example the input has type (AssignedBit<F>, AssignedNative<F>, AssignedNative<F>) and
the output has type AssignedNative<F>. When lowering to Picus we cannot use
these types directly because PCL does not support user defined types and everything is a field element. The extractor
works around this issue by creating two auxiliary tables (one for inputs and another for outputs) that represent
the inputs and outputs of the circuit as individual cells. In the example above we need 3 cells in the input auxiliary
table and 1 cells in the output auxiliary table. This is because AssignedNative<F> is an alias over Halo2’s
AssignedCell<F,F>, which takes up 1 cell, and AssignedBit<F> wraps an AssignedNative<F>.
As an example, we are going to add support to the following type as we explain the concepts.
struct AssignedFoo<F> {
    foo: [AssignedNative<F>; 10],
    bar: AssignedBit<F>
}
The extractor knows how many cells a type occupies using the
CellReprSize
trait from the mdnt-support crate.
This trait has a constant usize that declares the amount of cells required.
Types such as AssignedCell<F,F> or [T;N] already
implement this trait, so we can leverage that for implementing the trait for AssignedFoo.
// Showcase of the implementation for AssignedCell.
impl<V, F> CellReprSize for AssignedCell<V, F> {
    const SIZE: usize = 1;
}

// For our type we can leverage the existing implementations.
impl<F> CellReprSize for AssignedFoo<F> {
    const SIZE: usize = <[AssignedNative<F>; 10]>::SIZE + <AssignedBit<F>>::SIZE; // Total 11 cells.
}
Now that we have the trait that declares the size of the type we can add support for reading, writing, or both.
For using the type as an input in a harness we need to implement LoadFromCells. And for using the type as an output
we need to implement StoreIntoCells. Both traits have 4 type parameters: F, C, E, and L. F is the type of the
field and needs to implement the ff::PrimeField trait. C is the chip we are using for the harness. In the example at the
beginning of this chapter it would be NativeChip. E is the extraction adaptor, which is a type that has a set of
associated types representing different Halo2 concepts. E must implement the Halo2Types trait in mdnt-support. Last, L does not necessarily need to implement any trait in order to satisfy either
LoadFromCells or StoreIntoCells. However, some implementations may require an instance of a Layouter and L can be constrained
to that trait (L: Layouter<F>).
impl<F, L, C, E> LoadFromCells<F, C, E, L> for AssignedFoo<F>
where
    F: PrimeField,
    E: Halo2Types<F>
{
    fn load(
        ctx: &mut ICtx<F, E>,
        chip: &C,
        layouter: &mut impl LayoutAdaptor<F, E, Adaptee = L>,
        injected_ir: &mut InjectedIR<E::RegionIndex, E::Expression>,
    ) -> Result<Self, E::Error> {
        // Inside this method we need to construct an instance of the type.
        Ok(Self {
            // We can leverage the existing implementations of the trait.
            foo: ctx.load(chip, layouter, injected_ir)?,
            bar: ctx.load(chip, layouter, injected_ir)?,
        })
    }
}

impl<F, L, C, E> StoreIntoCells<F, C, E, L> for AssignedFoo<F>
where
    F: PrimeField,
    E: Halo2Types<F>
{
    fn store(
        self,
        ctx: &mut OCtx<F, E>,
        chip: &C,
        layouter: &mut impl LayoutAdaptor<F, E, Adaptee = L>,
        injected_ir: &mut InjectedIR<E::RegionIndex, E::Expression>,
    ) -> Result<(), E::Error> {
        // Inside this method we need to convert the type into a set of cells.
        // Again, we can leverage existing implementations.
        self.foo.store(ctx, chip, layouter, injected_ir)?;
        self.bar.store(ctx, chip, layouter, injected_ir)
    }
}
Inside those traits the programmer has the freedom to perform the conversion in different ways.
The ctx gives access to the raw cells. The chip and layouter allow performing the conversion
via some method the chip implements. For example, because the target chip implements a trait that
already has the desired logic (adding C: ThatTrait to the where bounds). injected_ir allows
writing Haloumi IR encoding semantic properties of the type.
For example, the implementations for
AssignedBit and AssignedByte in midnight-circuits emit IR that constraints the value to be within the
range of the types; 0-1 and 0-255 respetively.
These traits require that the type has a known size and won’t work well with types that have dynamically sized types such as Vec.
To work around this limitation we can use the following pattern.
/// Dynamically sized version of AssignedFoo
struct AssignedFooDyn<F> {
    foo: Vec<AssignedNative<F>>,
    bar: AssignedBit<F>
}

/// We create a new type that has a known length.
/// We will implement the traits on this type and use it as input and/or output.
/// Inside the harness we then convert between this type and [`AssignedFooDyn`].
struct LoadedFooDyn<F, const N: usize> {
    foo: AssignedFooDyn<F>,
    _marker: PhantomData<[(); N]>
}

impl<F, const N: usize> From<LoadedFooDyn<F, N>> for AssignedFooDyn<F> {
    fn from(value: LoadedFooDyn<F, N>) -> Self {
        value.foo
    }
}

// And implement the traits on this new type wrapper.

impl<F, const N: usize> CellReprSize for LoadedFooDyn<F, N> {
    const SIZE: usize = <AssignedNative<F>>::SIZE * N + <AssignedBit<F>>::SIZE; // Total N+1 cells.
}

impl<F, L, C, E, const N: usize> LoadFromCells<F, C, E, L> for LoadedFooDyn<F, N>
where
    F: PrimeField,
    E: Halo2Types<F>
{
    fn load(
        ctx: &mut ICtx<F, E>,
        chip: &C,
        layouter: &mut impl LayoutAdaptor<F, E, Adaptee = L>,
        injected_ir: &mut InjectedIR<E::RegionIndex, E::Expression>,
    ) -> Result<Self, E::Error> {
        let foo_arr: [AssignedNative<F>; N] = ctx.load(chip, layouter, injected_ir)?;
        Ok(Self {
            foo: AssignedFooDyn {
                foo: foo_arr.to_vec(),
                bar: ctx.load(chip, layouter, injected_ir)?,
            },
            _marker: PhantomData
        })
    }
}

impl<F, L, C, E, const N: usize> StoreIntoCells<F, C, E, L> for LoadedFooDyn<F, N>
where
    F: PrimeField,
    E: Halo2Types<F>
{
    fn store(
        self,
        ctx: &mut OCtx<F, E>,
        chip: &C,
        layouter: &mut impl LayoutAdaptor<F, E, Adaptee = L>,
        injected_ir: &mut InjectedIR<E::RegionIndex, E::Expression>,
    ) -> Result<(), E::Error> {
        let foo_arr: [AssignedNative<F>; N] = self.foo.foo.try_into().map_err(|_| {
            // Handle error...
        })?;
        foo_arr.store(ctx, chip, layouter, injected_ir)?;
        self.foo.bar.store(ctx, chip, layouter, injected_ir)
    }
}